Installing the wall sleeve
NOTICE: If the slope of the core drill hole is too low, condensation can run towards the interior wall. Ensure a slope of 1...2 % towards the exterior wall so that any condensation which collects can drip off to the outside.
Exercise CAUTION when handling construction foam. Wear protective gloves and goggles.
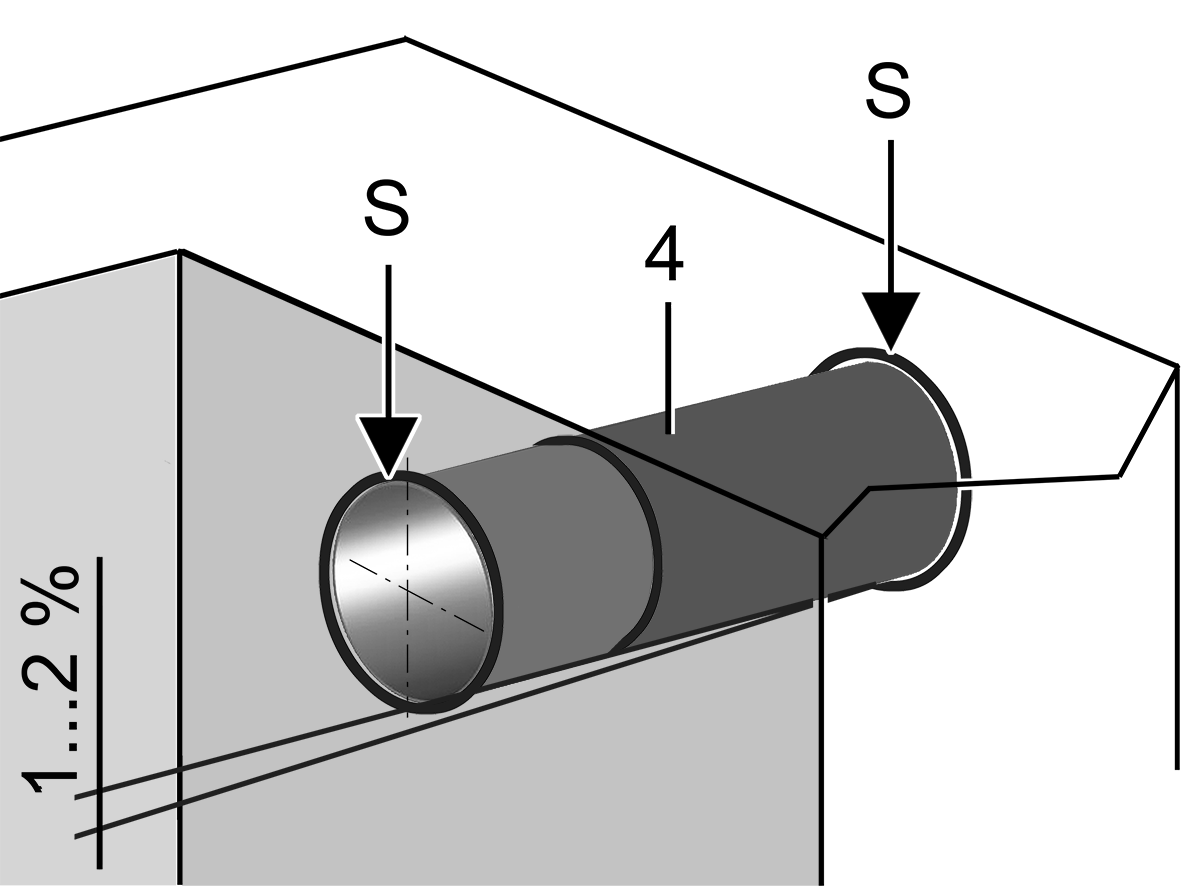
4 | Wall sleeve |
S | Sealing material |
- Drill a core drill hole in the wall.
- Push the two-part wall sleeve into the wall (large sleeve diameter to the outside). Select the length of the wall sleeve so that it is flush with the plaster on both sides.
- Seal the gaps between the wall sleeve and the wall all around in a permanently elastic and weather-resistant manner. Fix the wall sleeve with non-pressing or expansion-free construction foam. Cut off protruding construction foam flush with the wall.
- When using an optional ALDS 10 storm protection: Stick the enclosed sealing strip onto the outer ring of the storm protection and insert the storm protection approximately in the middle of the wall sleeve. Ensure that the installation position is vertical, the silicone lamellae must not hang down under their own weight.
 If walls have a wooden construction, additionally seal the interfaces to this construction. Stick sealing strips onto the wall sleeve in these areas.