Installation, electrical connection
Installation instructions
- Only install unit on a dry, flat surface. Do not distort housing. Any installation position can be selected.
- Select installation location outside of traffic area. Protect unit from direct sunlight. Ensure sufficient heat dissipation.
Installation
- Loosen both of the housing cover screws and remove the housing cover.
- Pull off both retaining brackets and remove the switch insert from the housing.
- Break out cable lead-throughs at the knockout points in the housing, according to the number of cables, and insert cable grommets. Insert the grommets so that they fit tightly against the housing and around connection cable cables.
- Mount the lower part of the housing on the wall. Suitable mounting material is to be provided by the customer.
- Guide the connection cables into the housing through the grommets, check for leak tightness.
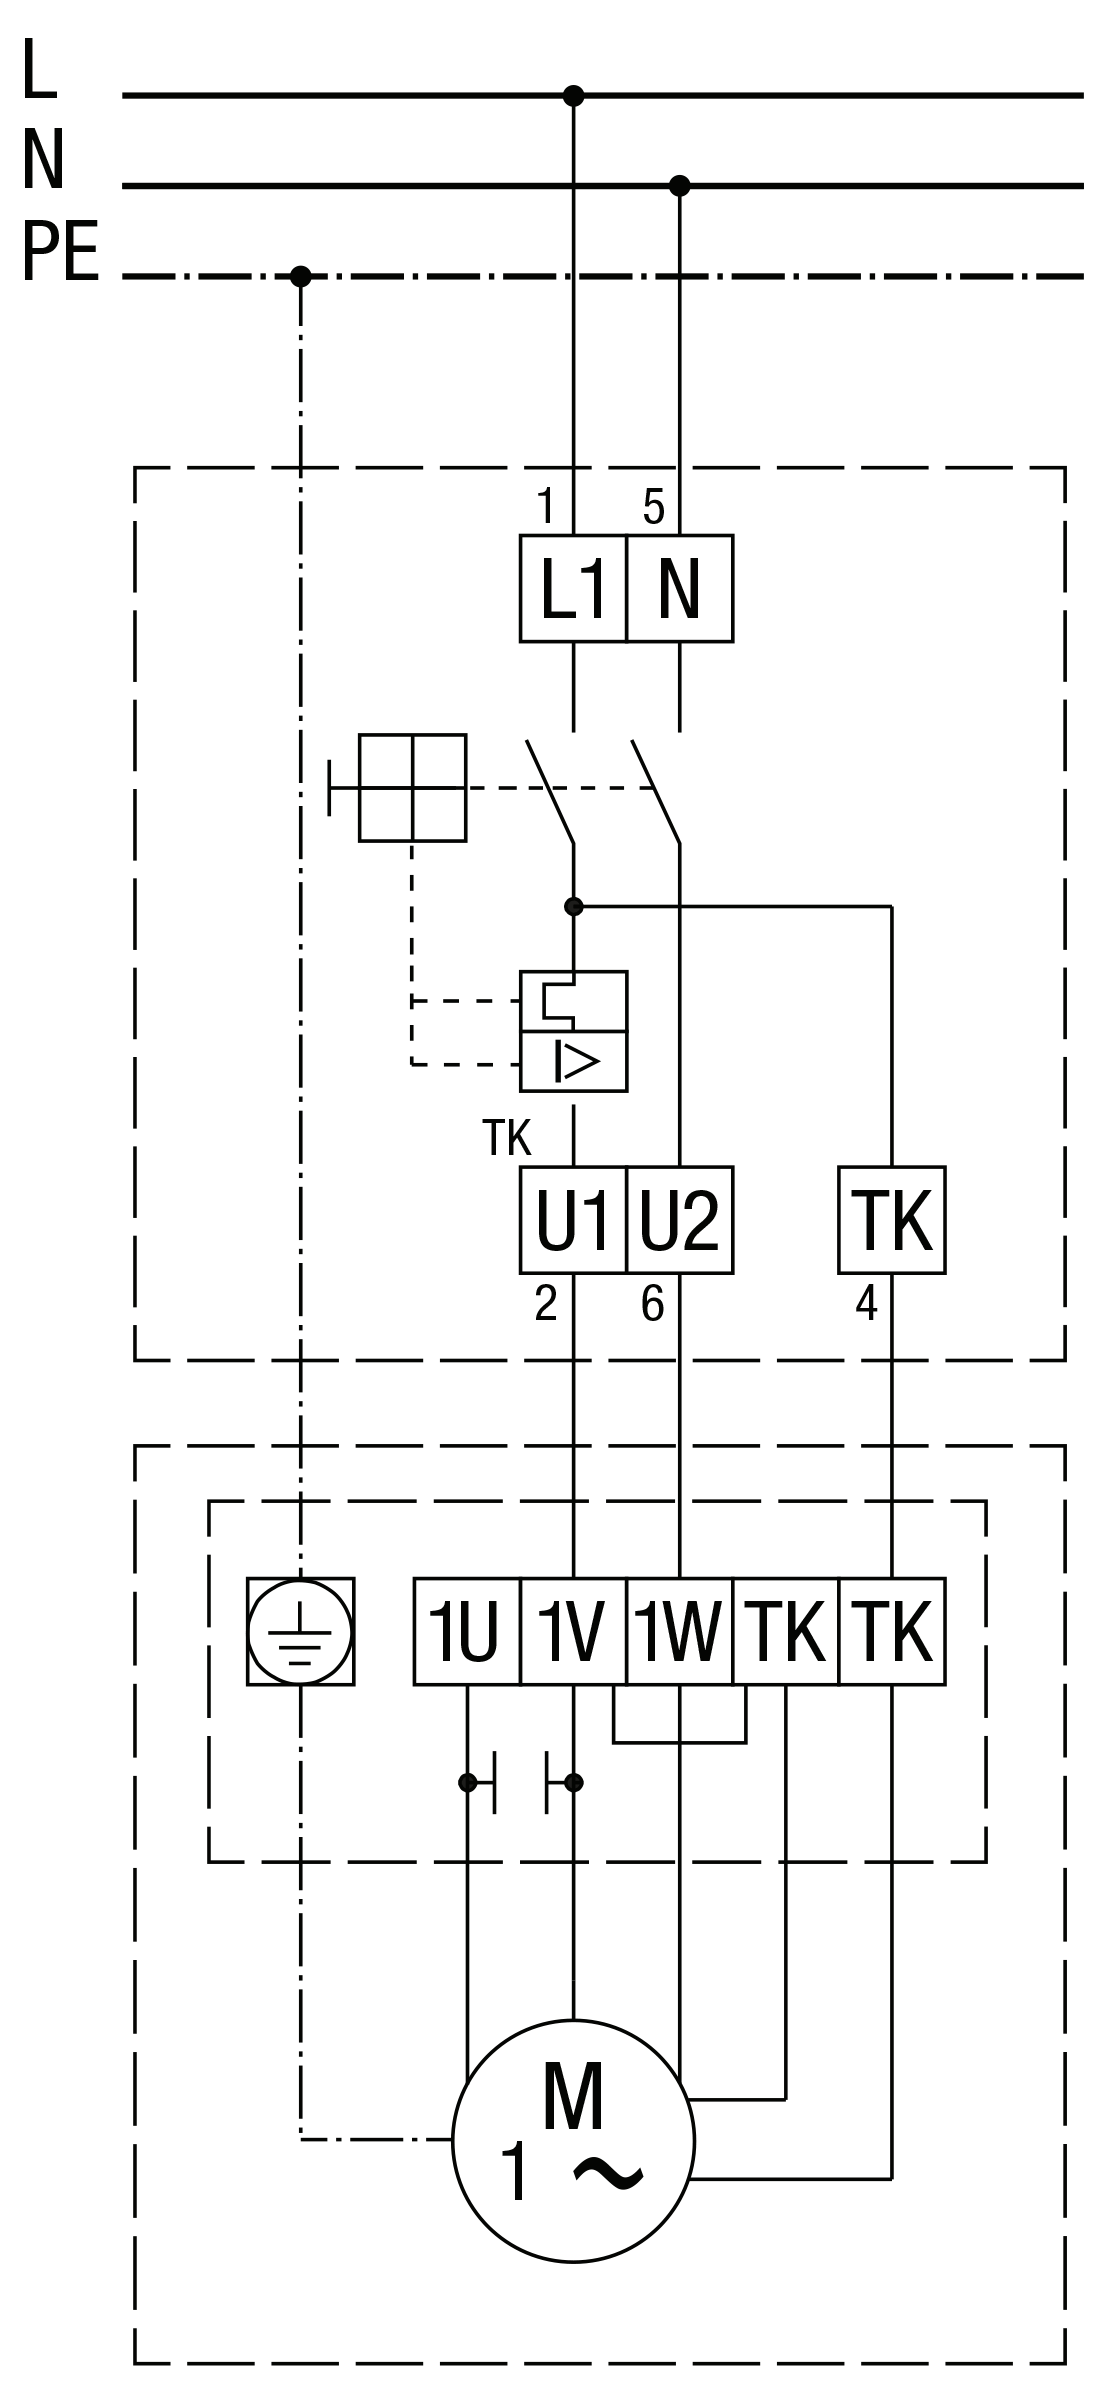
- The connection of the mains voltage must be at the top, the connection of the motor must be at the bottom. Swapping the input and output sides is not permitted.
- Wire motor protection switch in accordance with wiring diagram.
 The connection of the mains voltage must be at the top, the connection of the motor must be at the bottom. Swapping the input and output sides is not permitted. Only connect thermal contact to terminals marked with TB.
- Insert the switch insert into the housing, insert both retaining brackets to secure and press all the way down.
- Fit housing cover and secure it with both screws. Make sure the wrap-around seal is correctly located in the upper part of the housing. NOTICE: Danger of short-circuits, caused by moisture, if the housing is not fully sealed.
- Install the fan.