Installation of WS 300 Flat
Front cover

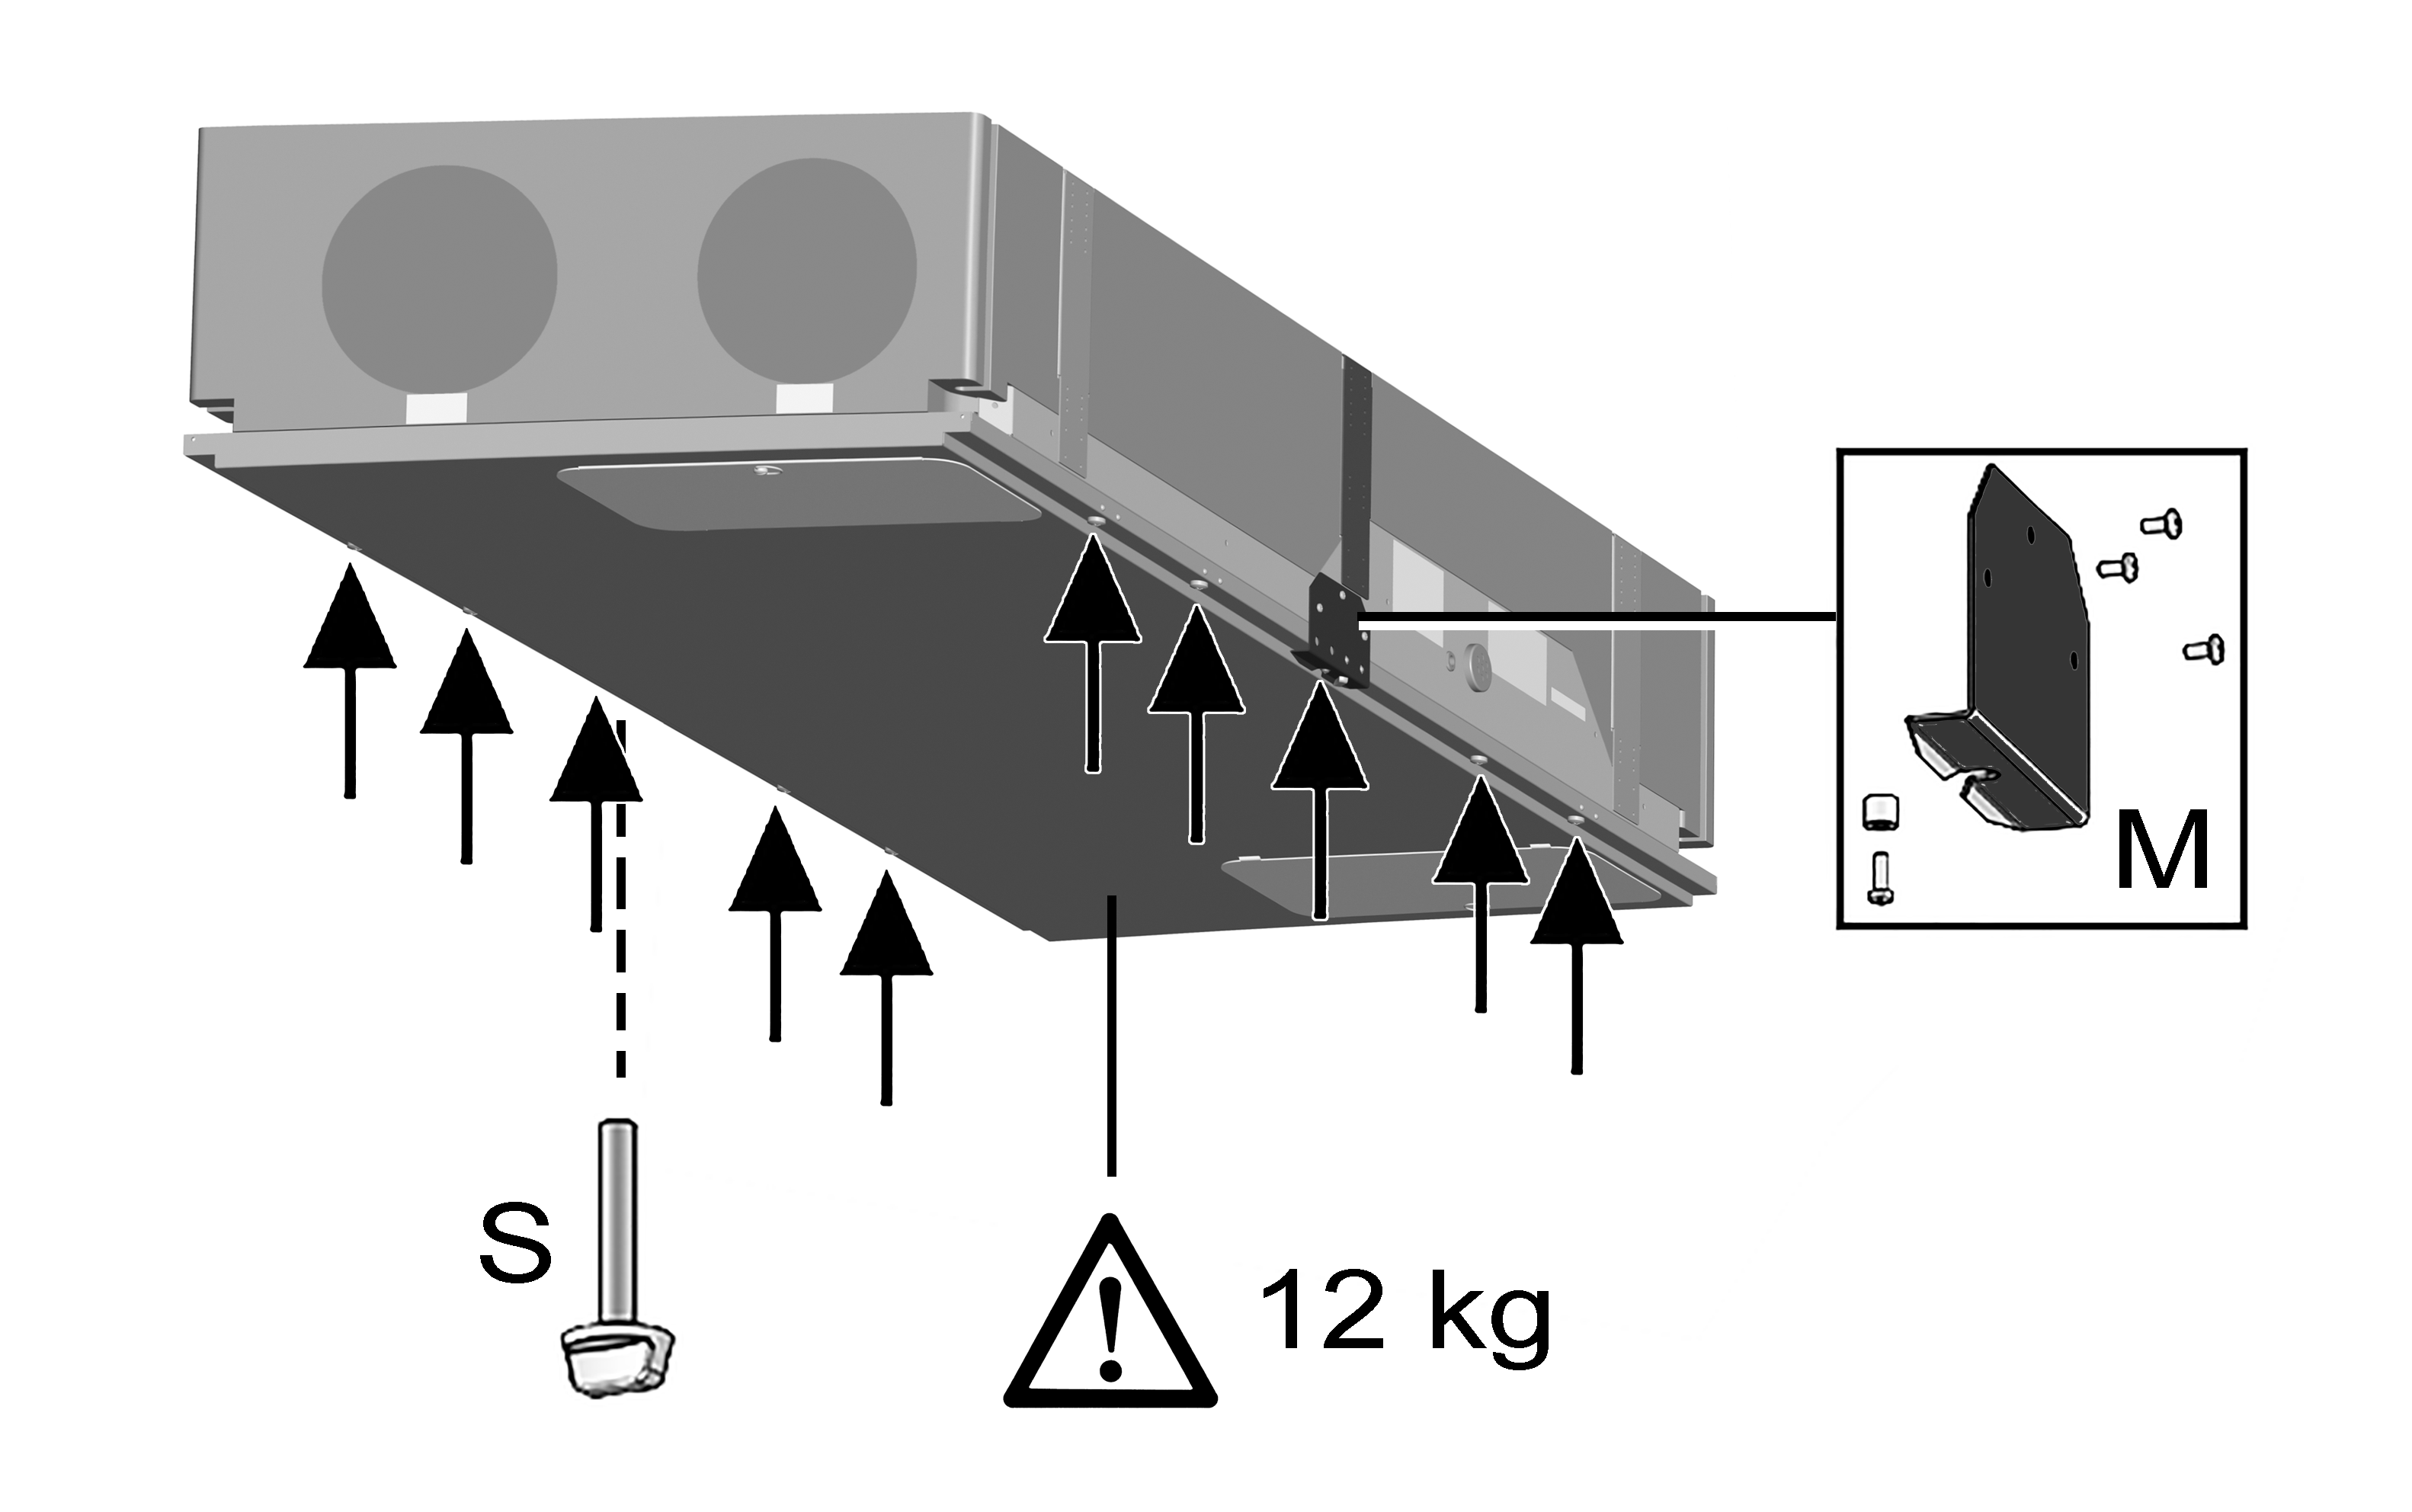
M | Set of installation aids for front cover |
S | Locking bolts |
- Fix set of installation aids for front cover as shown.
- Attach retaining screw on opposite side. Not necessary before initial installation if the ventilation unit is on the ground.
- Remove the 8 screws that hold the front cover in place.
- Unscrew retaining screw.
- Remove front cover
- When installing for the first time (ceiling, wall), take out the air filters and heat exchanger.
Fix ventilation unit on the ceiling or wall

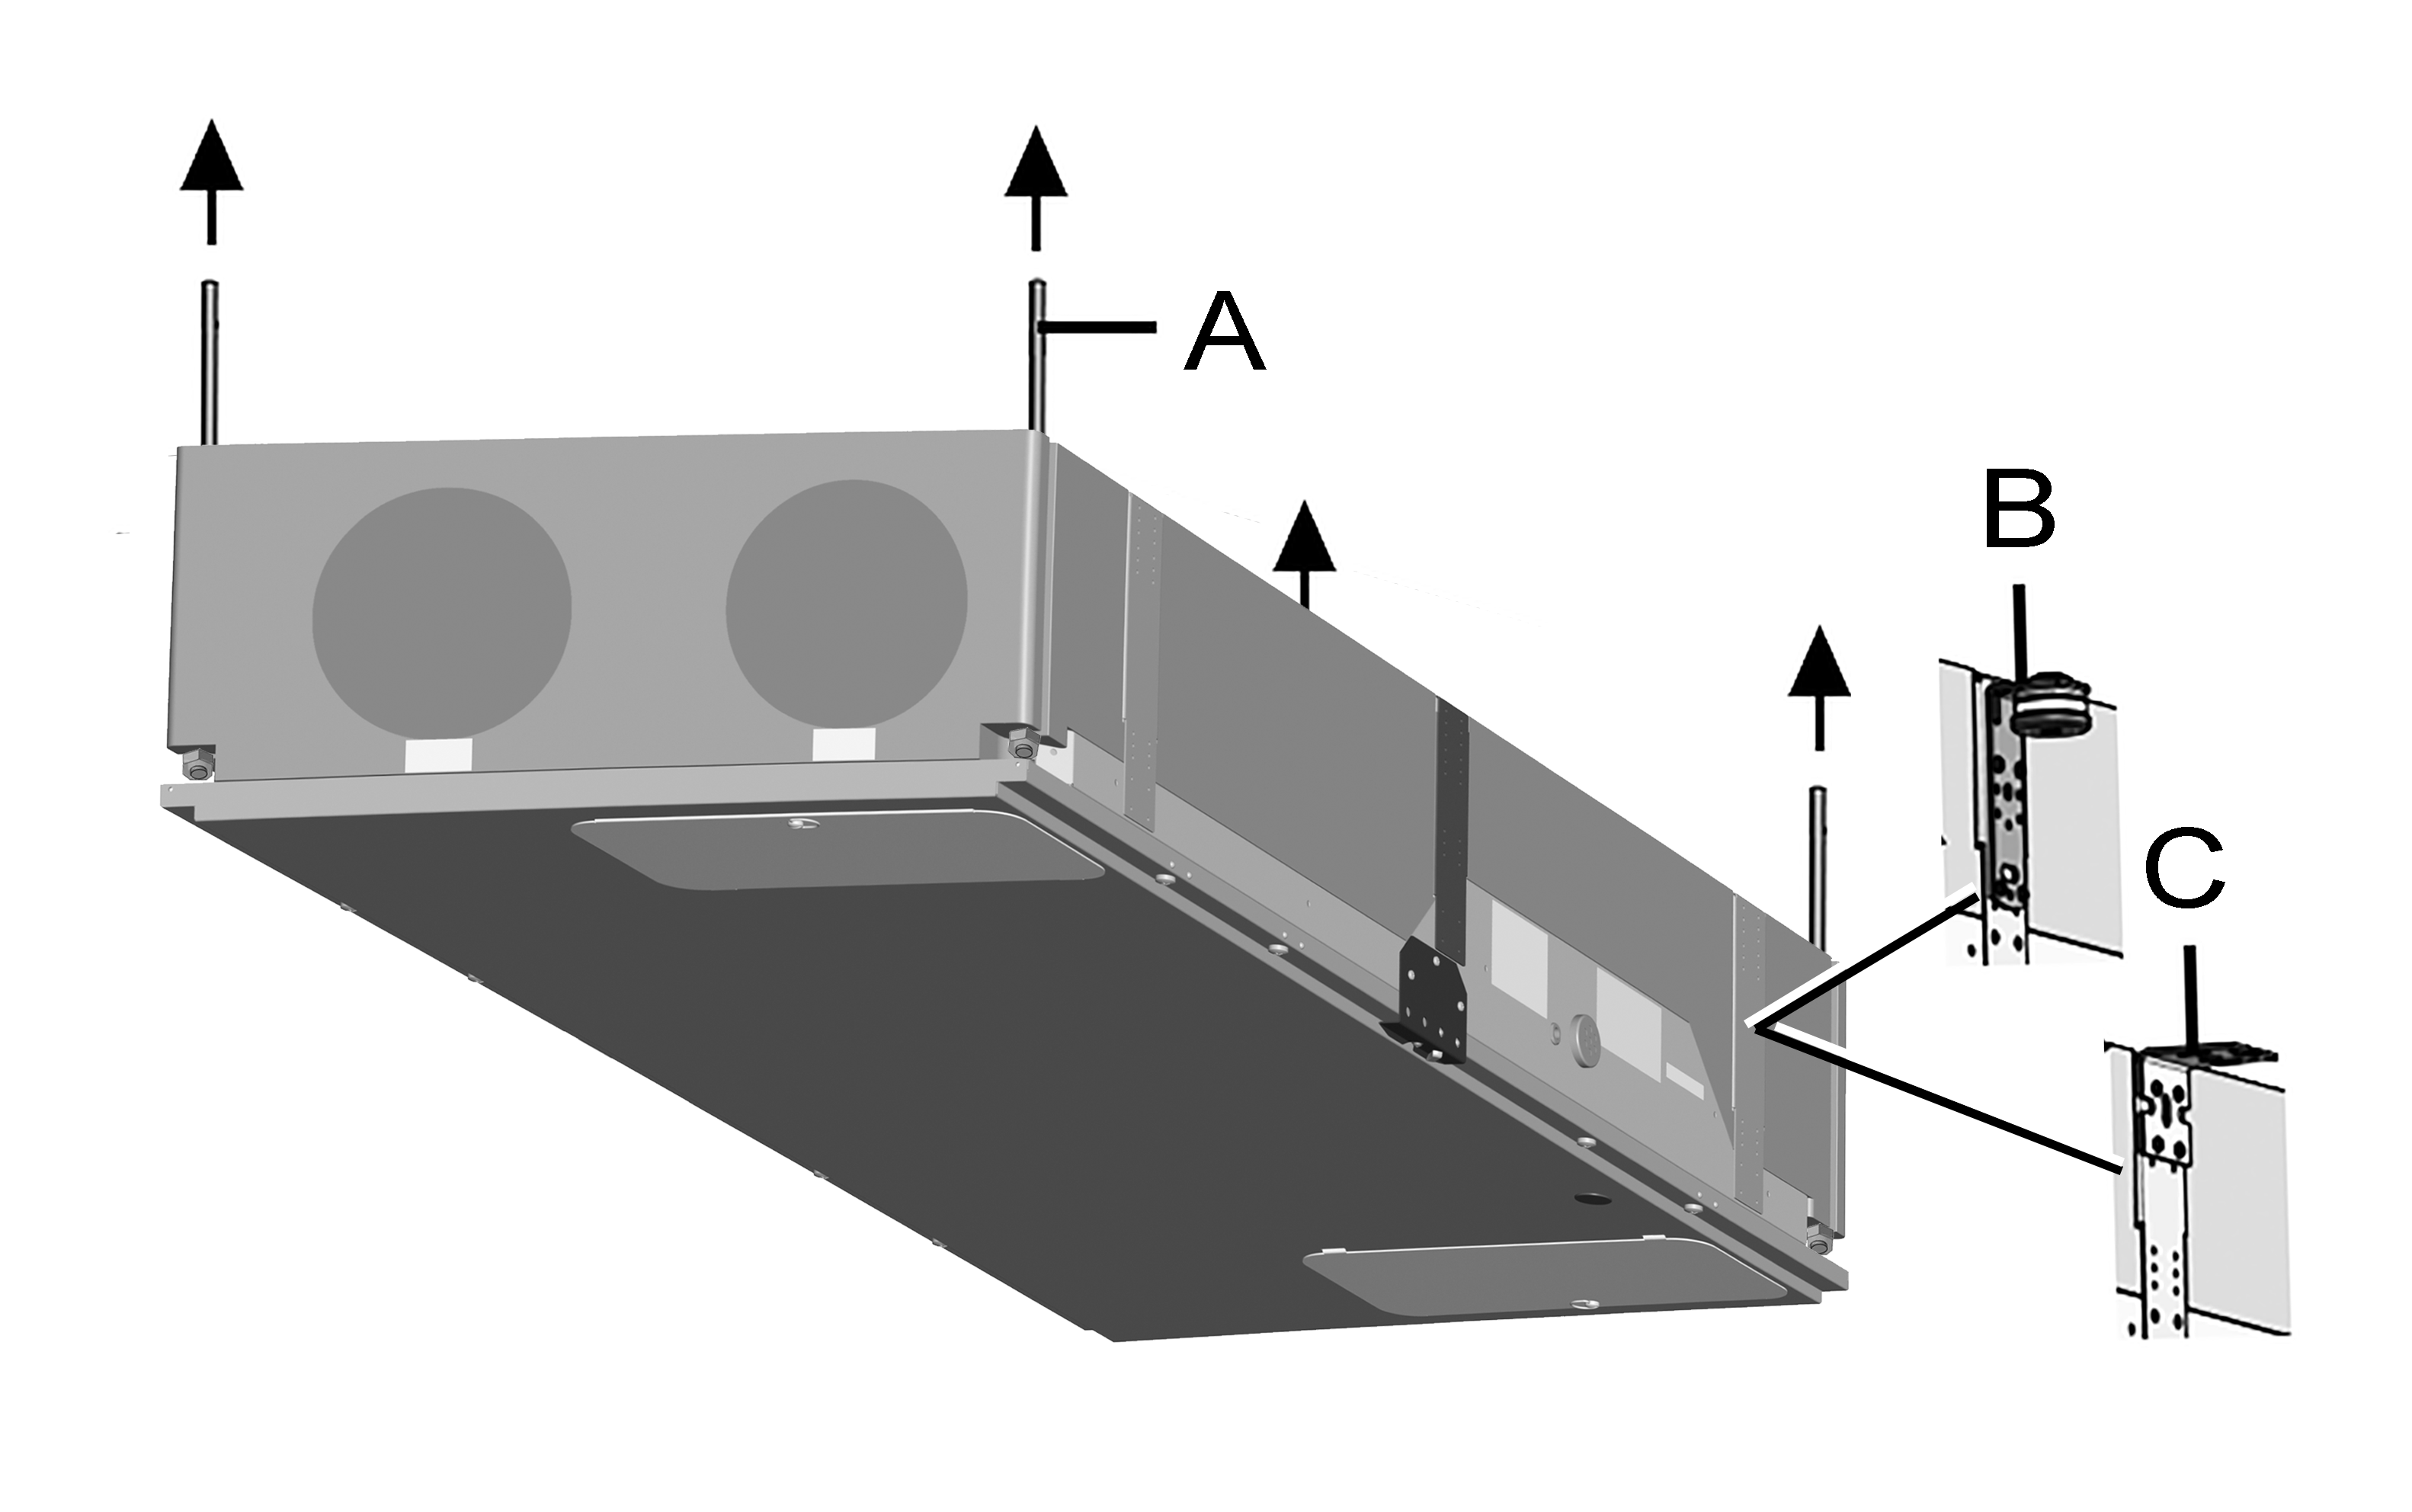
Mounting variants [A], [B] or [C]
A | Threaded pin |
B | Ceiling bracket with damping element |
C | Universal fixing bracket |
- Firmly screw down ventilation unit to ceiling or wall with appropriate mounting material (4 items each). Mounting material is to be provided by the customer. Note the unit weight of 28 kg. Observe accident prevention requirements.
[A] Ceiling mounting with threaded pins
- Mount threaded rods on the ceiling.
- Fit ventilation unit and secure to prevent it from falling.
- Fit air filter, heat exchanger and front cover. You MUST use the set of installation aids for the front cover to prevent the cover from falling off.
[B] Mounting using ceiling brackets with damping element
- Fit the 4 ceiling brackets at the side of the housing plates of the ventilation unit as shown.
- Firmly screw down ventilation unit to the ceiling at the ceiling brackets using appropriate mounting material.
- Fit air filter, heat exchanger and front cover. You MUST use the set of installation aids for the front cover to prevent the cover from falling off.
[C] Universal fixing brackets (wall, ceiling)
- Fit the 4 universal fixing brackets at the side of the housing plates of the ventilation unit as shown.
- Firmly screw down ventilation unit to the ceiling/wall with appropriate mounting material.
- Fit air filter, heat exchanger and front cover. You MUST use the set of installation aids for the front cover to prevent the cover from falling off.
 If the ventilation unit is already installed, before taking off the front cover be sure that the set of installation aids included in the scope of supply is fitted. Observe accident prevention requirements.