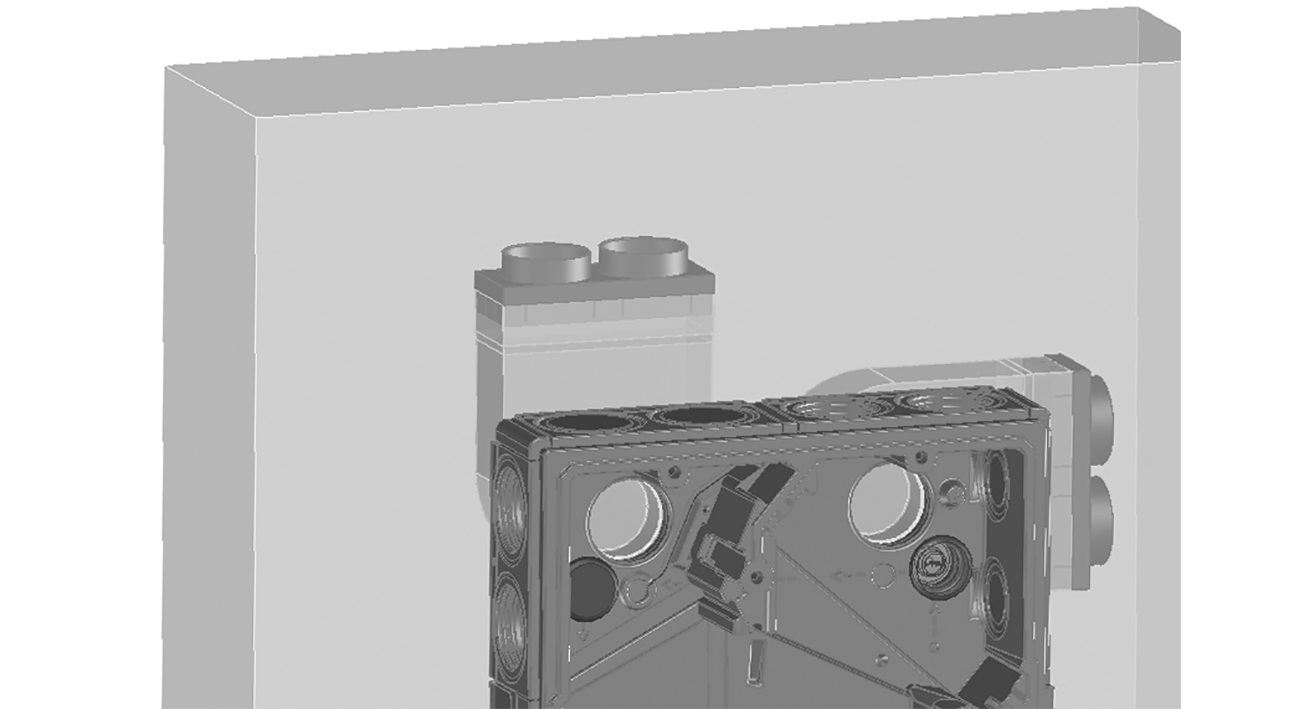
Surface mounting of WS 75 RSAP: Supply air/exhaust air on wall side, connections at rear (second room)
In addition to the supply air and exhaust air openings on the side of the Powerbox H, a further supply air and/or exhaust air connection can be set up on the rear wall side. The connection of the ducts is made using the MF-WL 100 brackets. These are installed at exact locations in the wall before the RSAP metal shell sheet is mounted.
- Use a hammer to press out the pre-punched supply air and/or exhaust air sheet metal openings from the RSAP metal shell sheet.
- Preparing the installation location → previous chapter. Proceed as described there in steps 2 to 6. In step 2, also mark the centres of the supply air and exhaust air hole.
- Make recesses for the MF-WL 100 brackets in the wall. When doing this, take into account the exact position of the SA/EA connections.

- Install the MF-WL 100 bracket in the wall and connect ducts to the MF-WL 100 brackets. Securely seal any connections not needed with plugs. ATTENTION: Supply air and exhaust air connection sockets must be flush with the finished tiled/plastered wall. Cut off the socket flush with the wall.
- To seal at the wall, apply a continuous strip of silicone all the way around the supply air and exhaust air sockets (silicone provided by customer).
- Undertake the rest of the installation as in steps 7 to 12 in the previous chapter.