Teaching-in ventilation unit
 The ventilation unit must be connected to the router or access point via the LAN/Ethernet interface on the main board → Installation and commissioning instructions for the ventilation unit, appendix, circuit diagrams, wiring diagrams.
- Open the wibutler app and register as a service partner.
The welcome screen appears with the Home menu item activated.

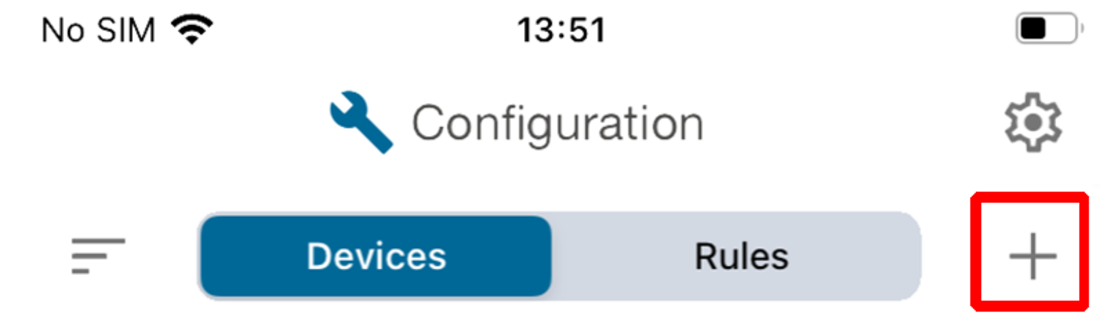
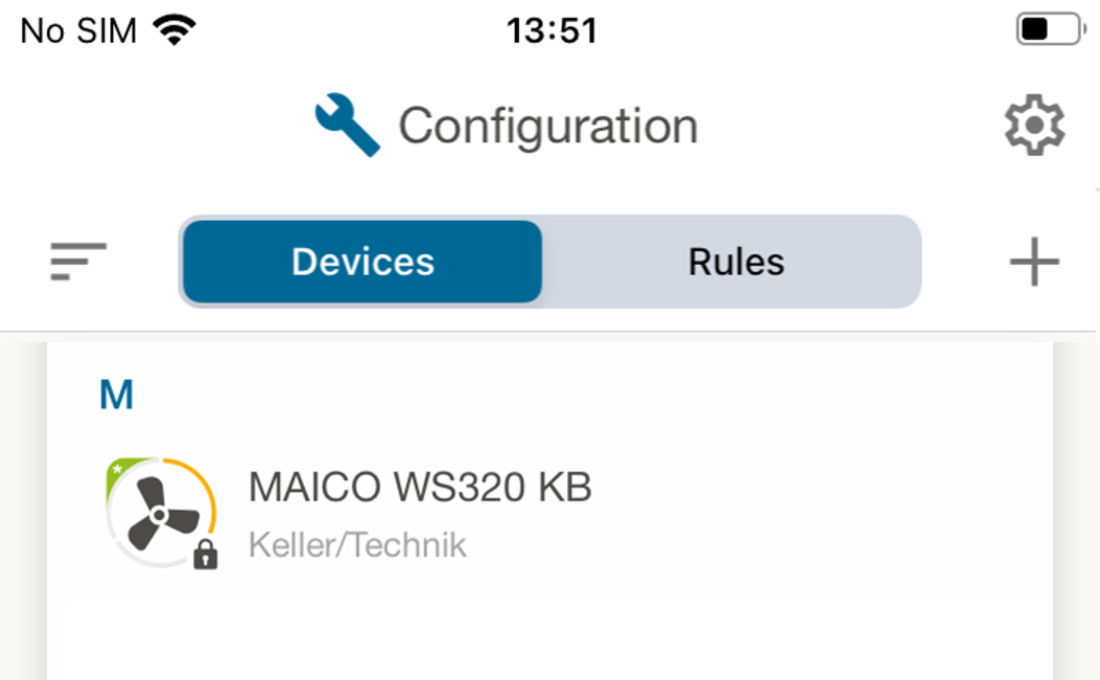
- Switch to the Configuration menu item.

- Select "+" to teach in a new ventilation unit.
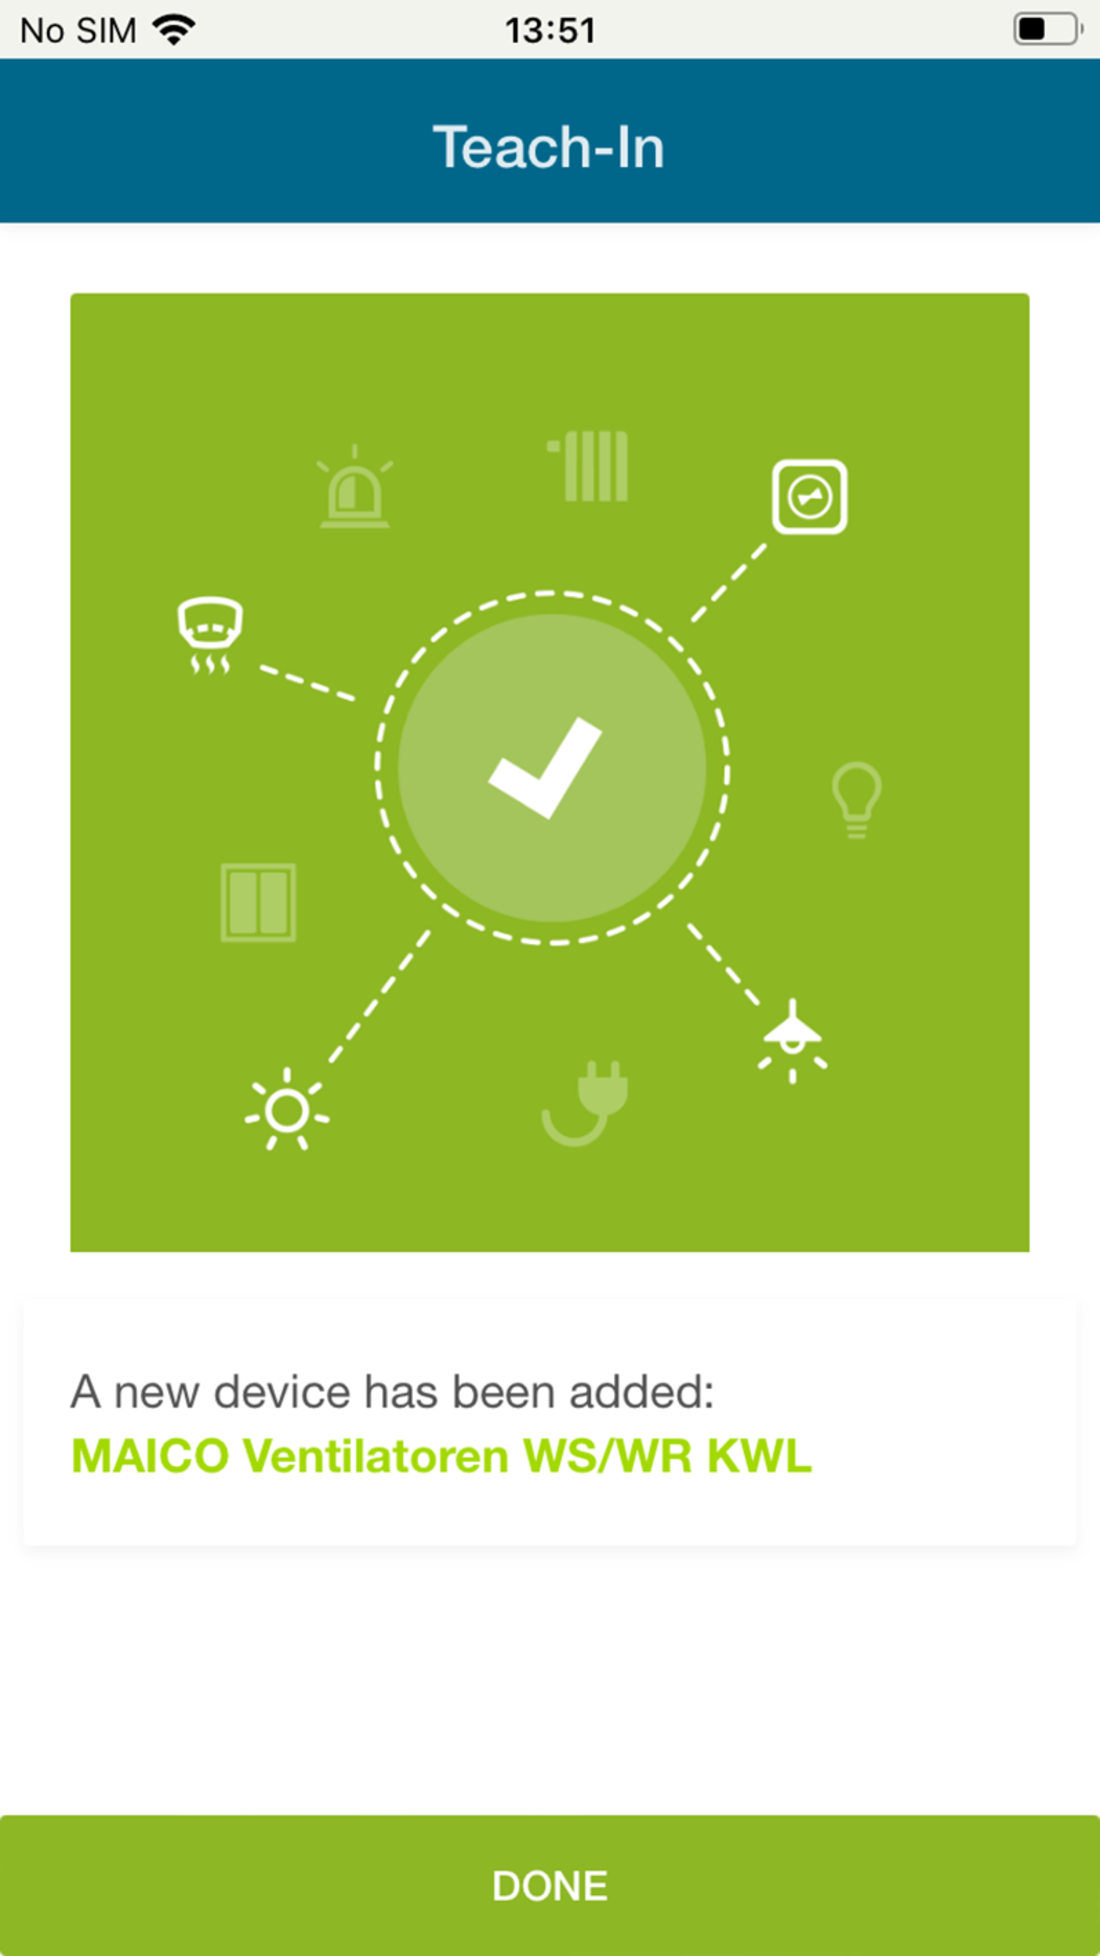
- Confirm with teach-in devices.
- To teach in the WS... ventilation unit, select the Maico logo in the manufacturer overview:

- Select WS/WR KWL (KWL = CDV controlled domestic ventilation) and confirm with TEACH-IN.

You will receive the following message:
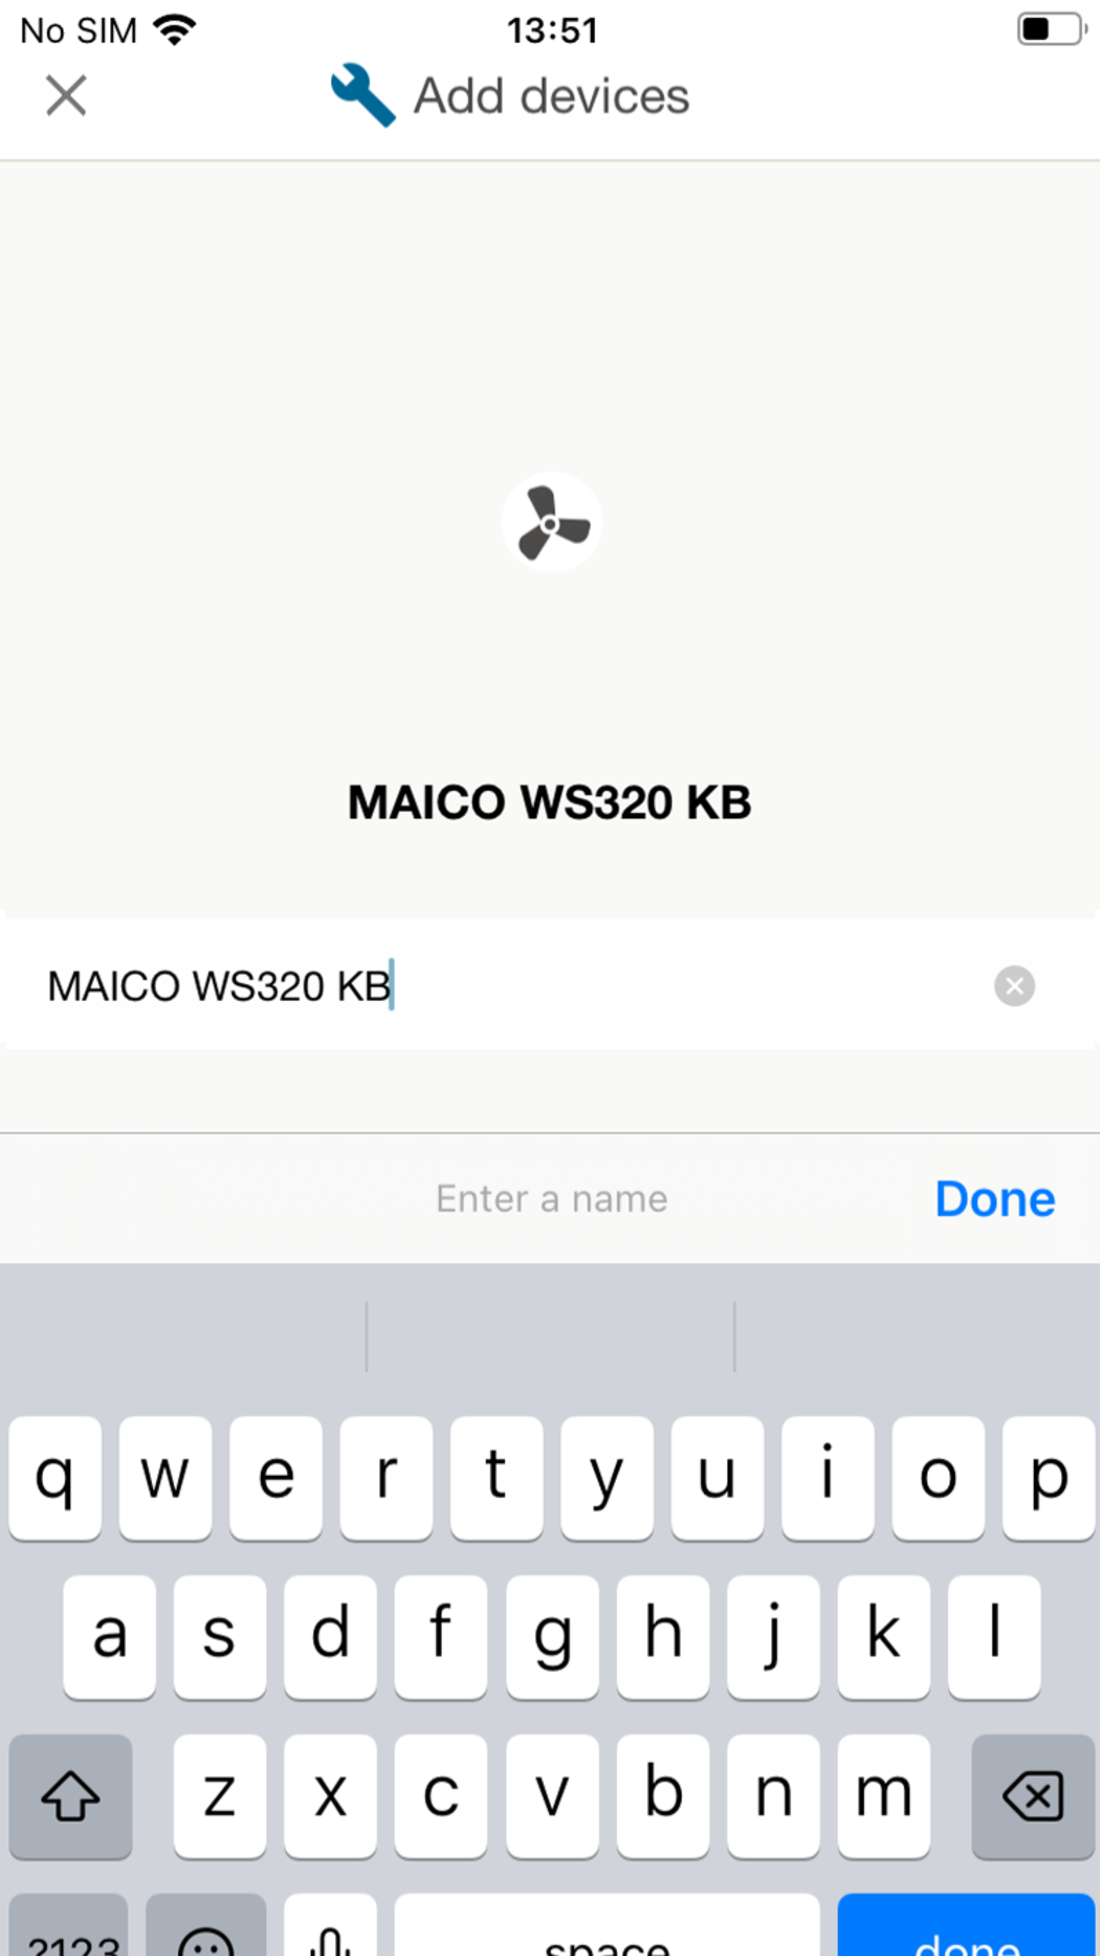
- Enter the type designation of the ventilation unit or the desired unit designation, for example WS 320 KB (central ventilation unit with preheating register, bypass and cross-counterflow heat exchanger) and confirm with Done.
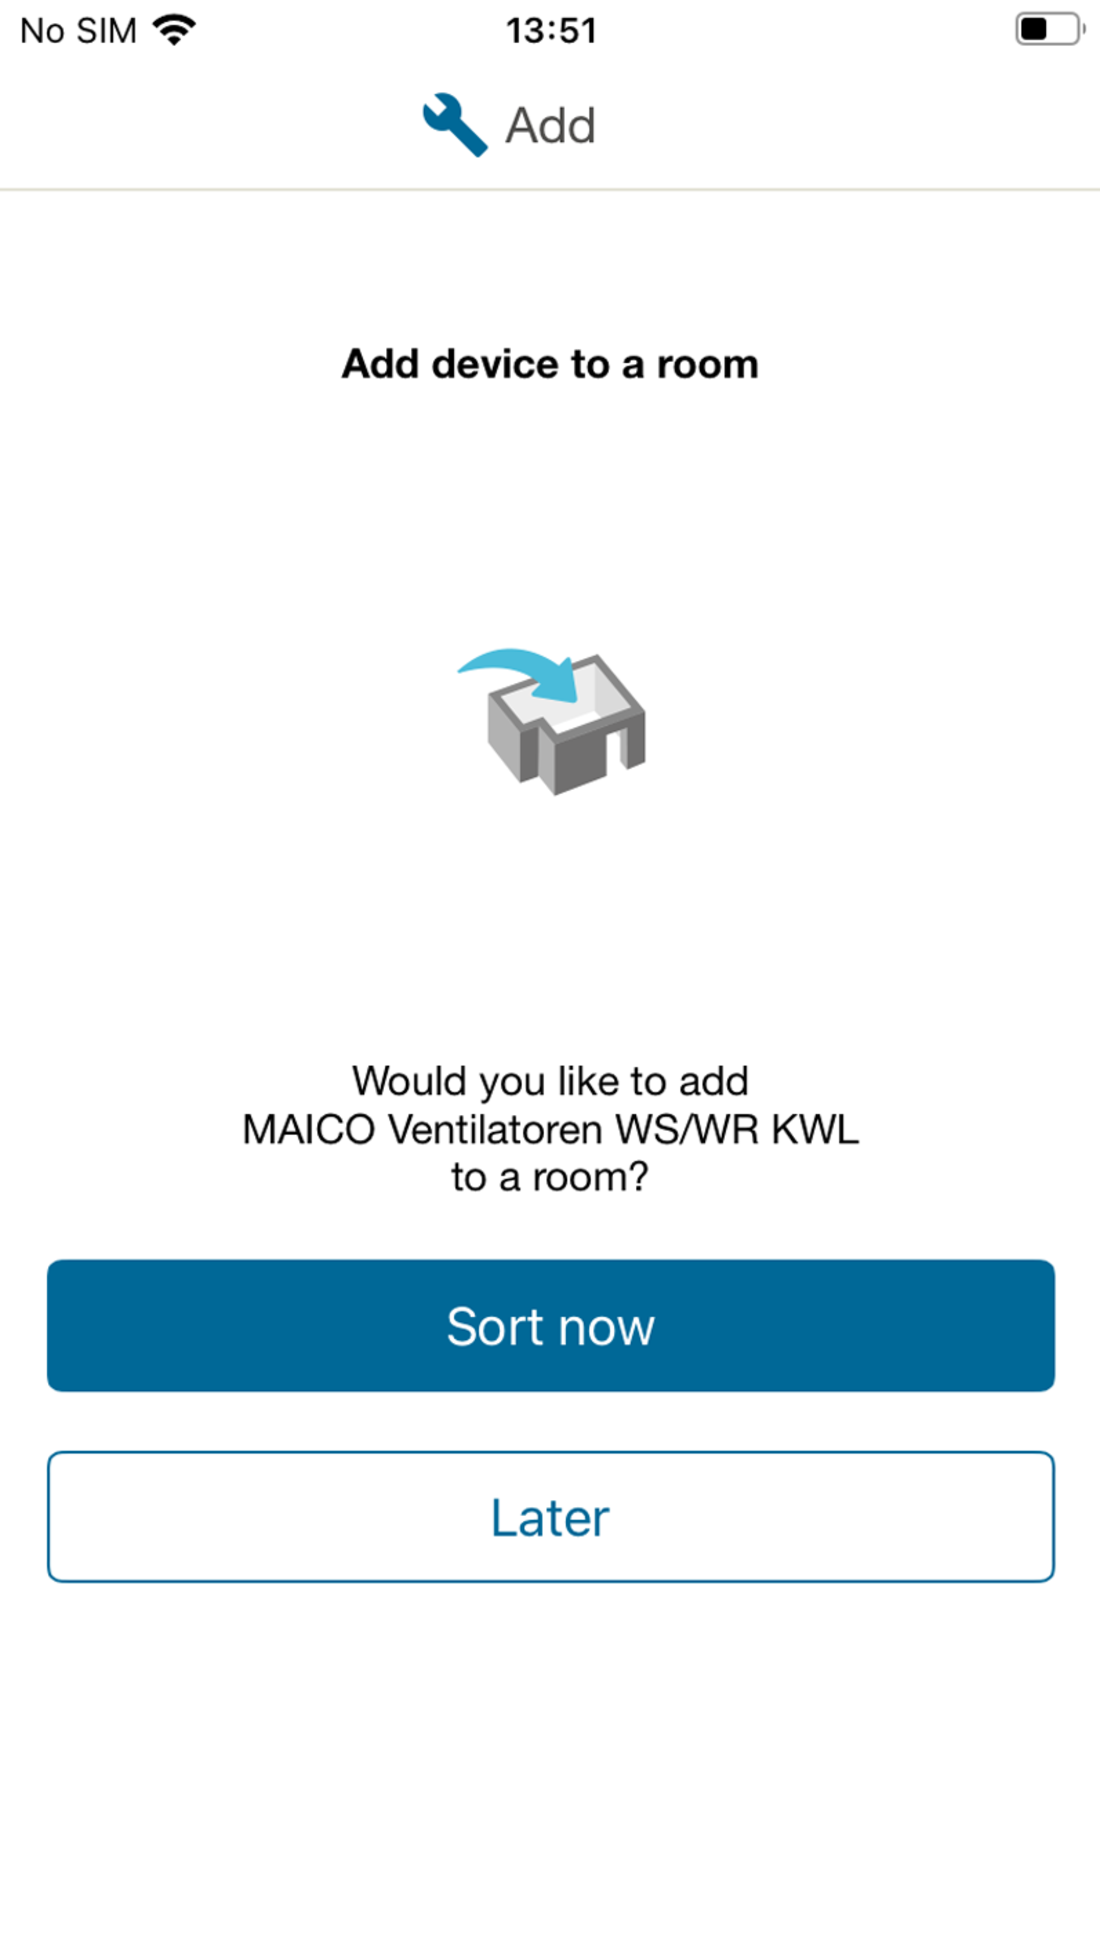
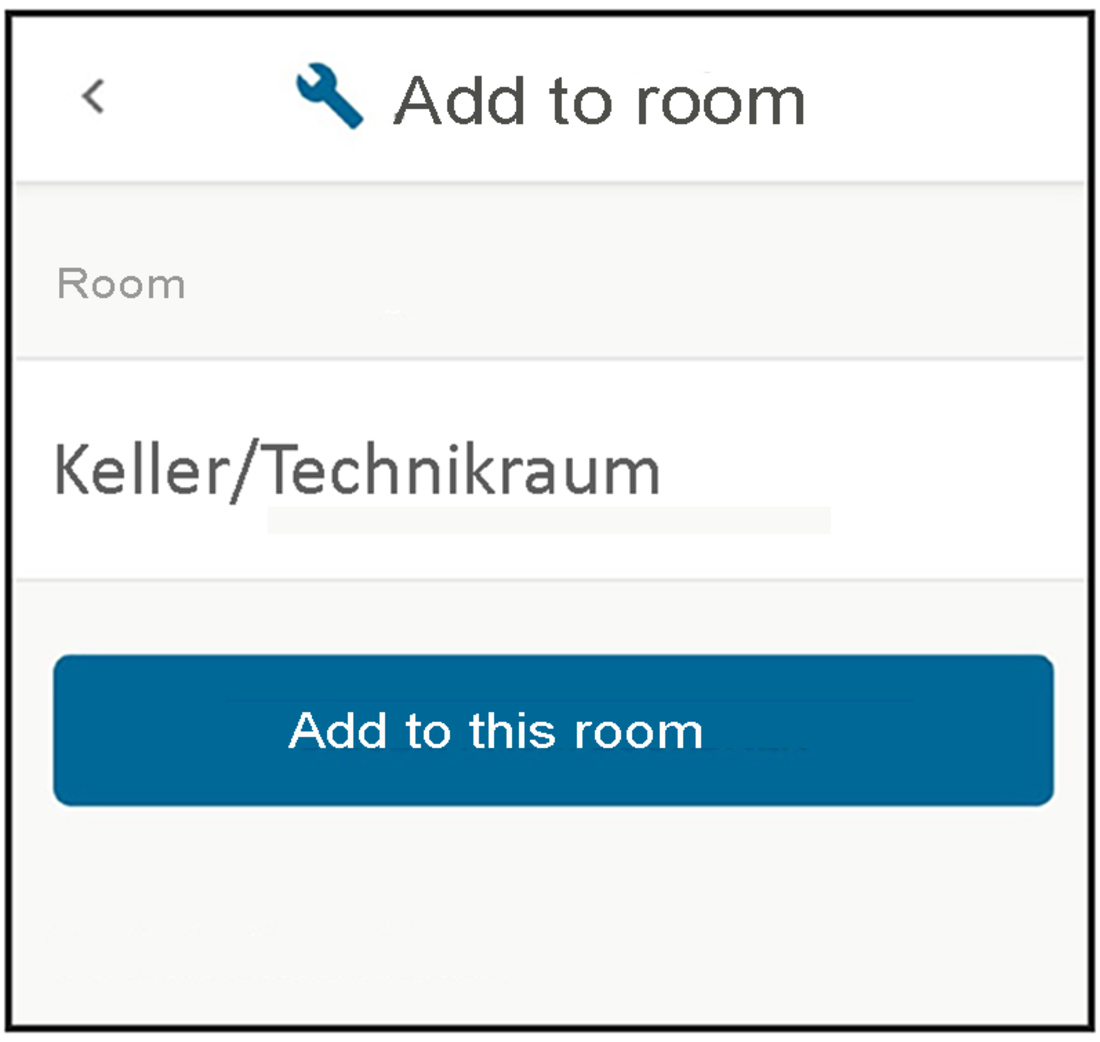
- You can now assign the ventilation unit to a room. Confirm with Sort now.
- Name the room in the input field provided, for example cellar/utility room, and confirm with ASSIGN TO THIS ROOM.
- The following appears:
You have successfully completed the basic settings.