Creating time programmes, defining setting ranges
Time programme/setting range = time-controlled ventilation control with selection of different ventilation levels and operating modes.
When creating a time programme/setting range, first select the setting range type (time range), select the ventilation unit and specify the target activity. Further specifications are made in 4 steps:
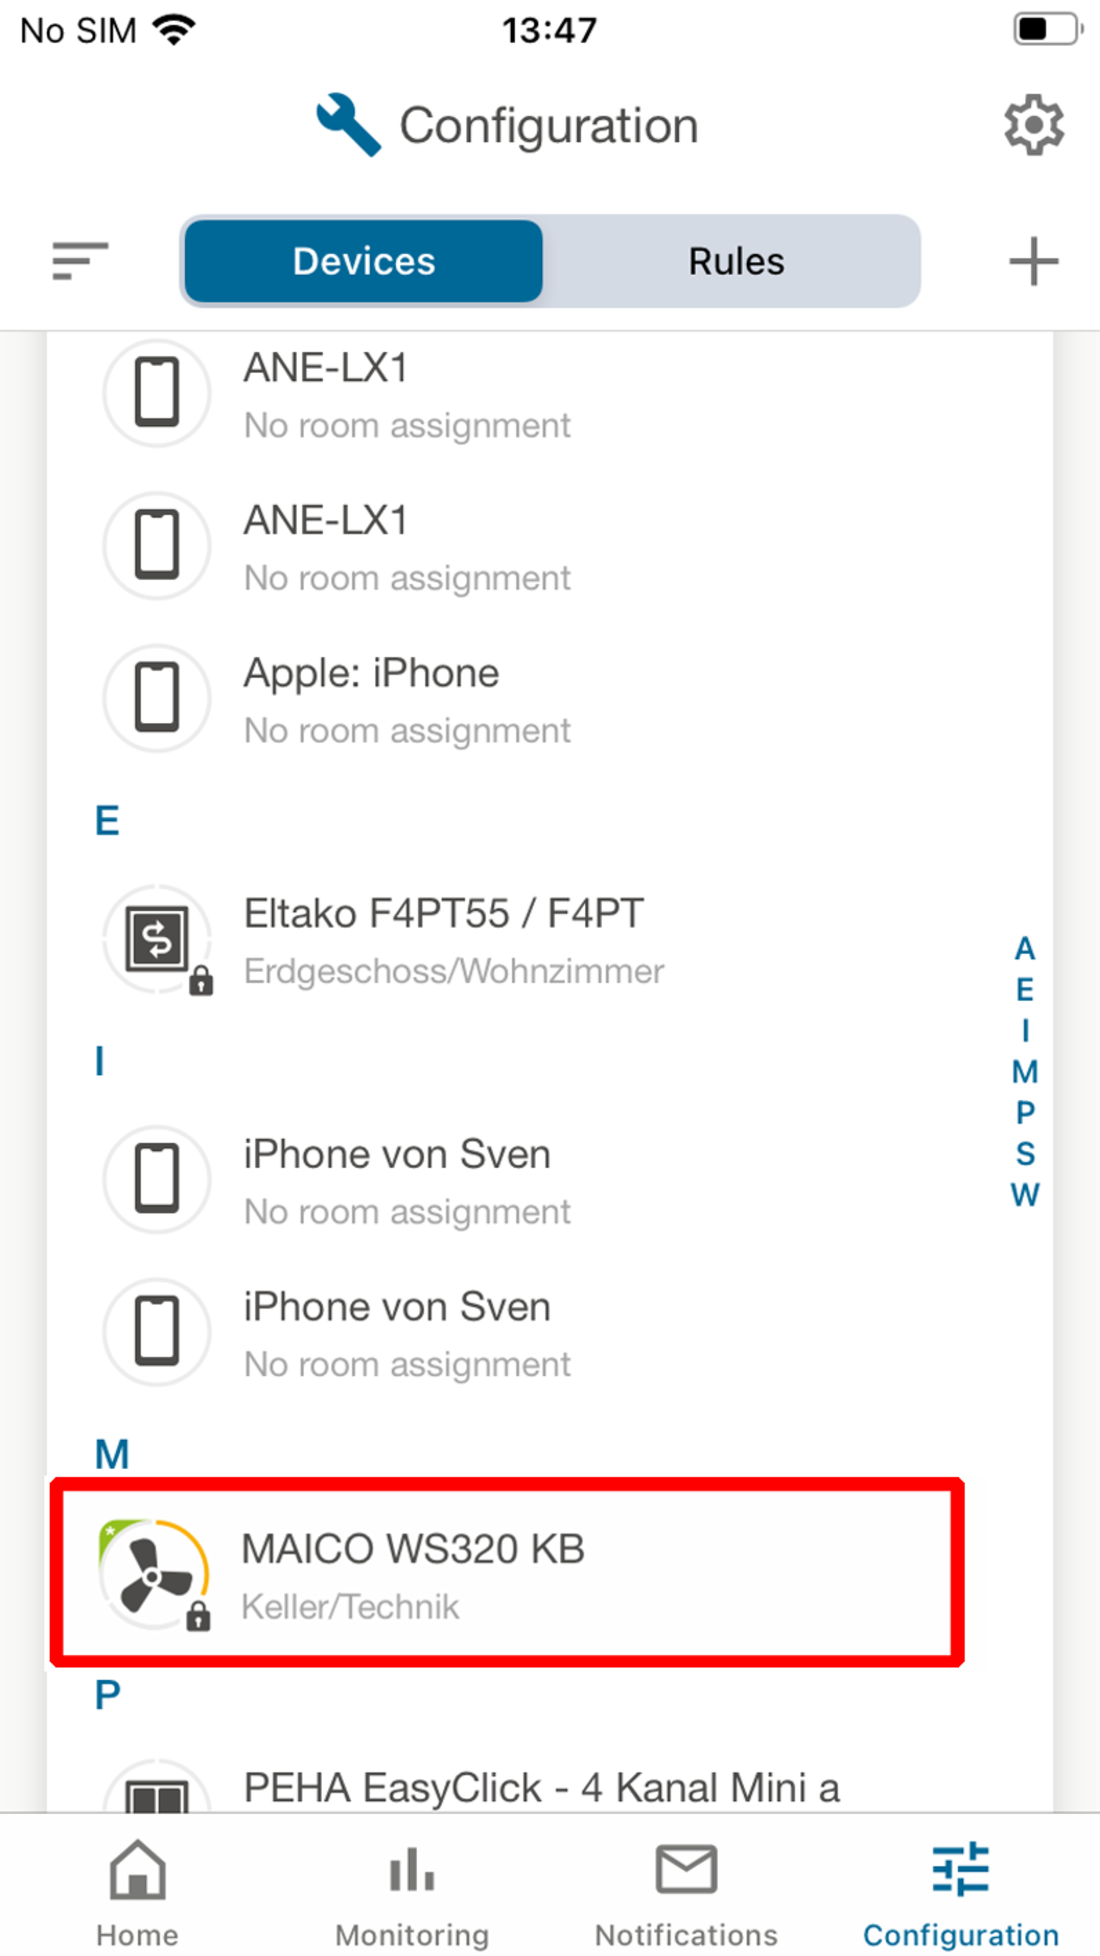
- Step 1: Select device, e.g. WS 320 KB ventilation unit.
- Step 2: Set start time marker with ventilation level and end time marker with ventilation level.
- Step 3: Set profile, e.g. holiday.
- Step 4: Name the time programme/setting range and add explanatory notes.
Set up weekly time programme
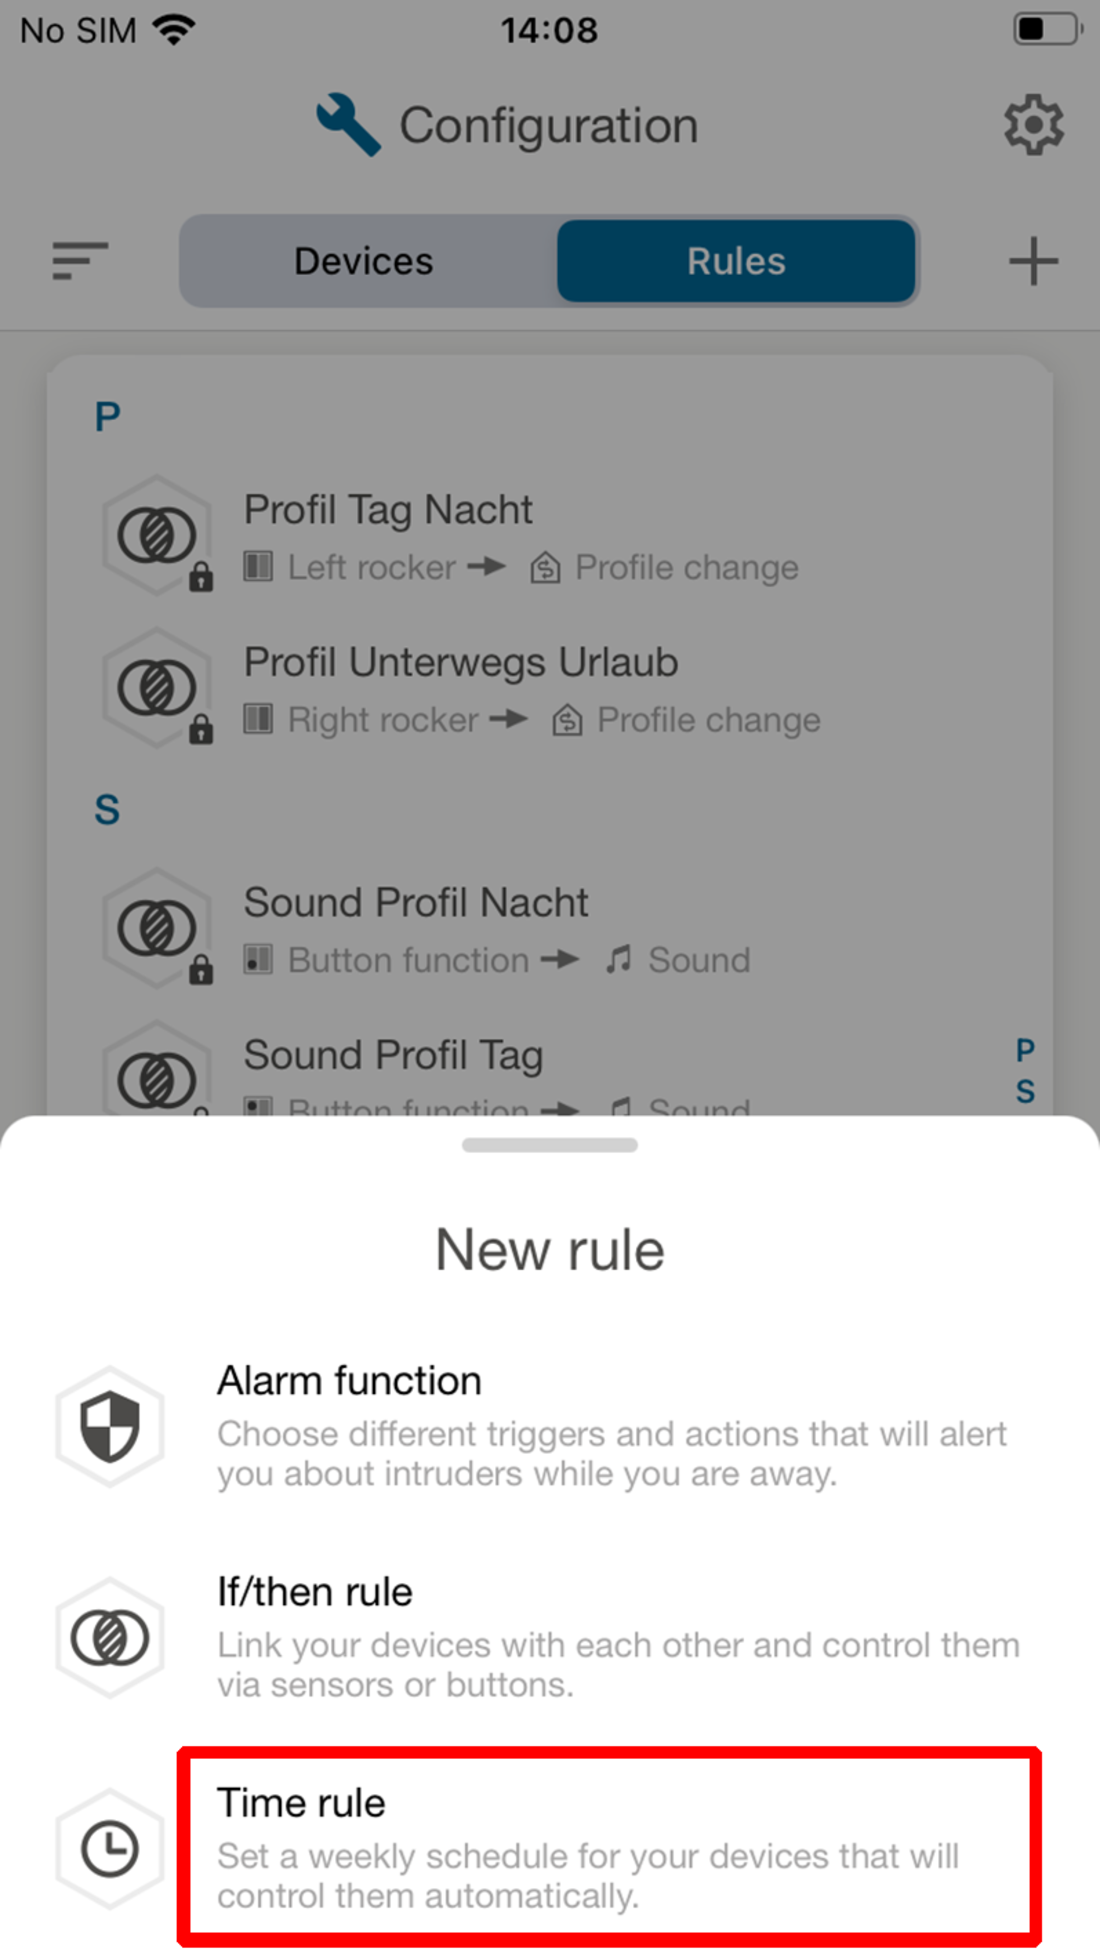
- Call up the Rules button in the configuration level. Press "+" to create a new setting range.
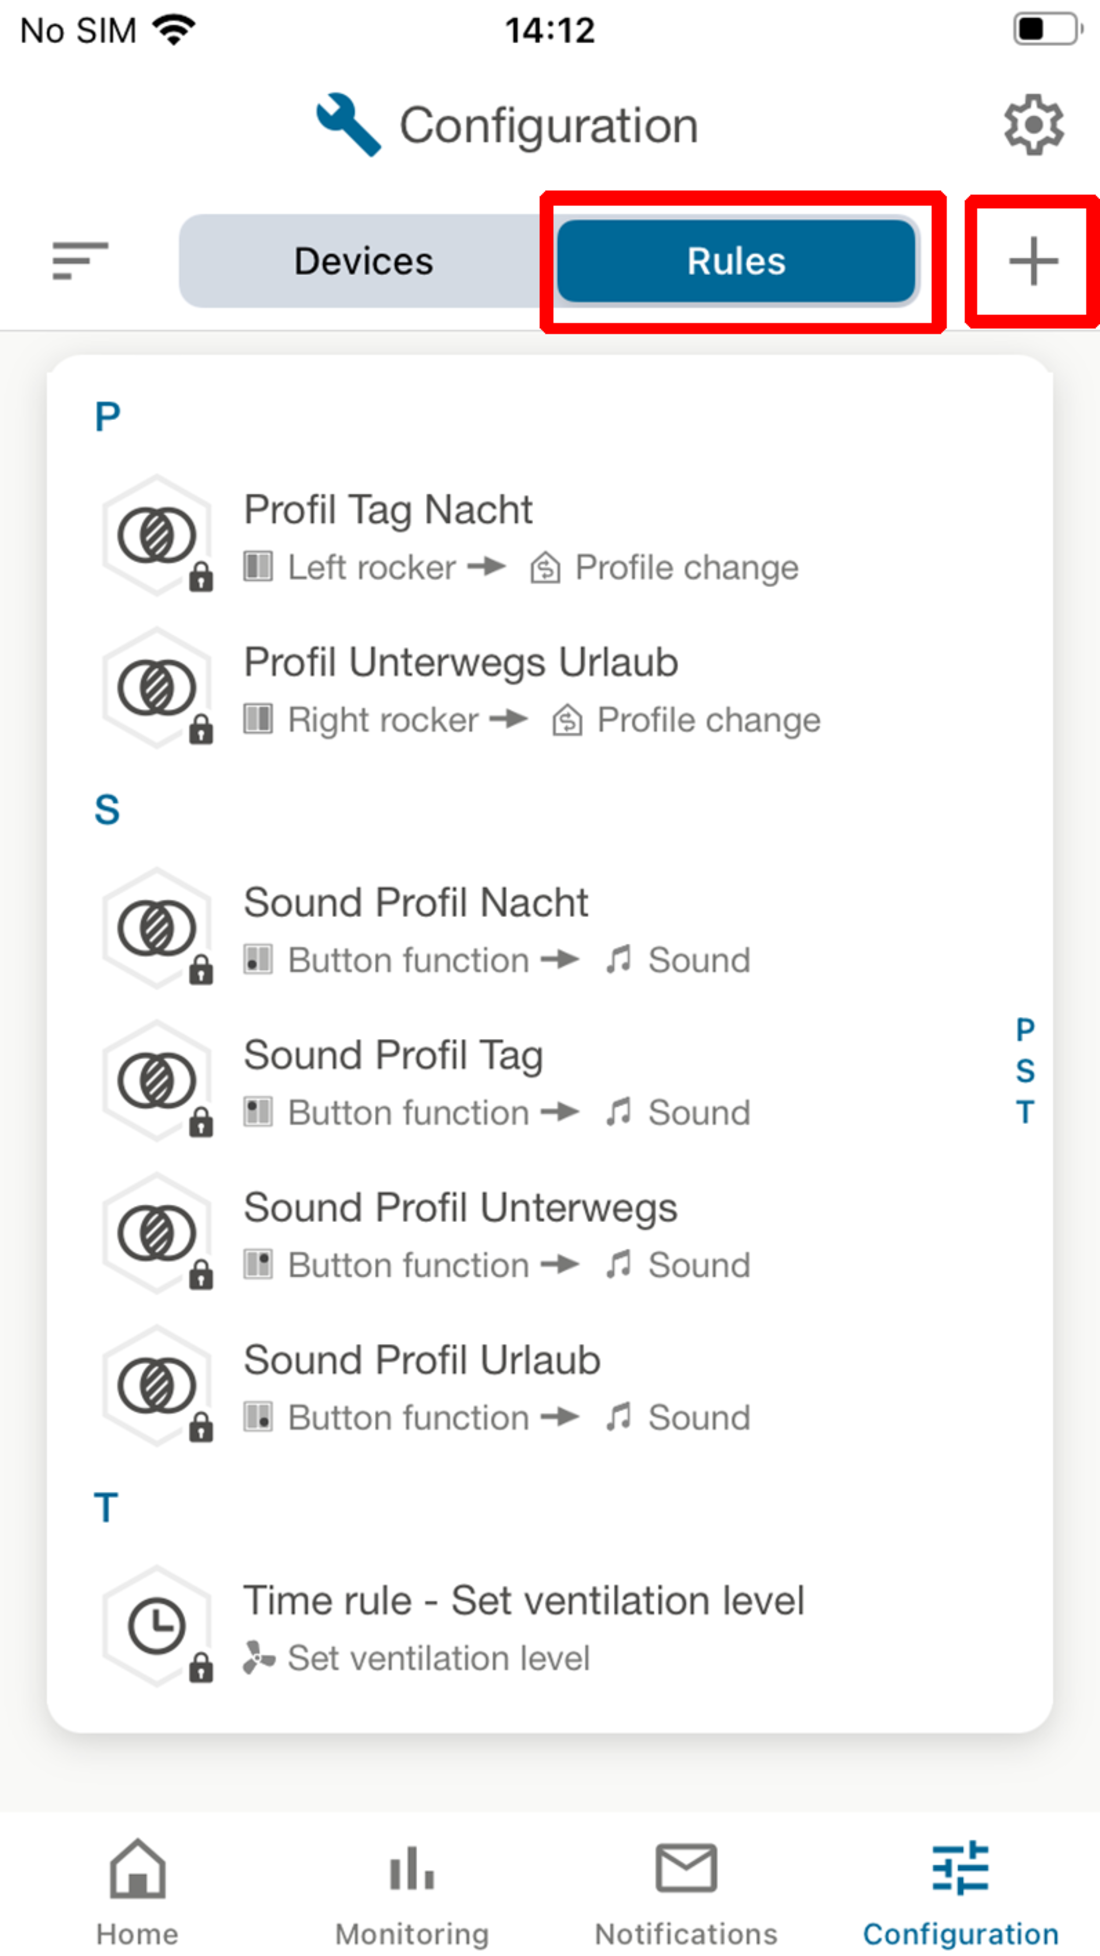
- Select the Time rule setting range to operate the ventilation unit automatically and time-controlled.
- Select the desired ventilation unit.
- Select the desired target activity from the 5 programmes, for example the Set ventilation level.
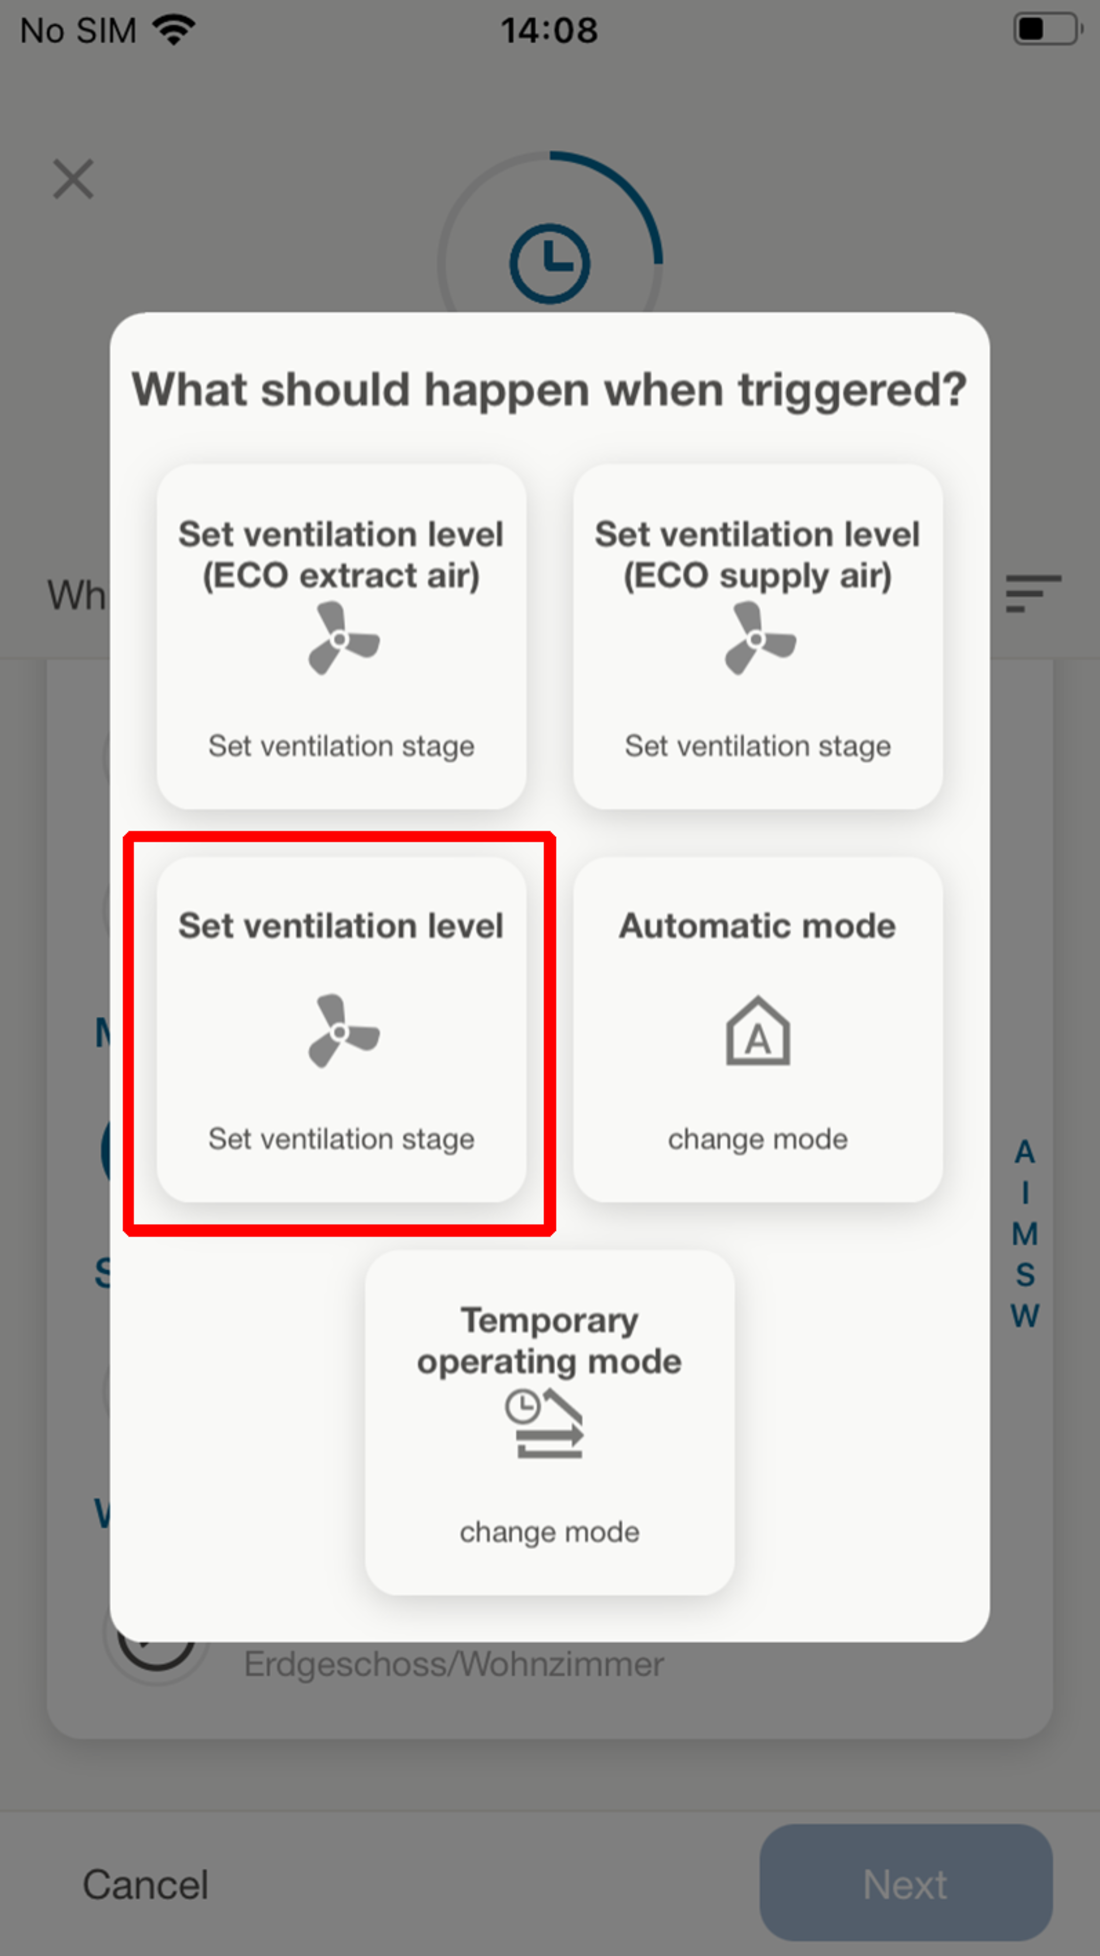
You will now be guided through 4 setting menus.
- Step 1: Select the ventilation unit that is to be time-controlled.
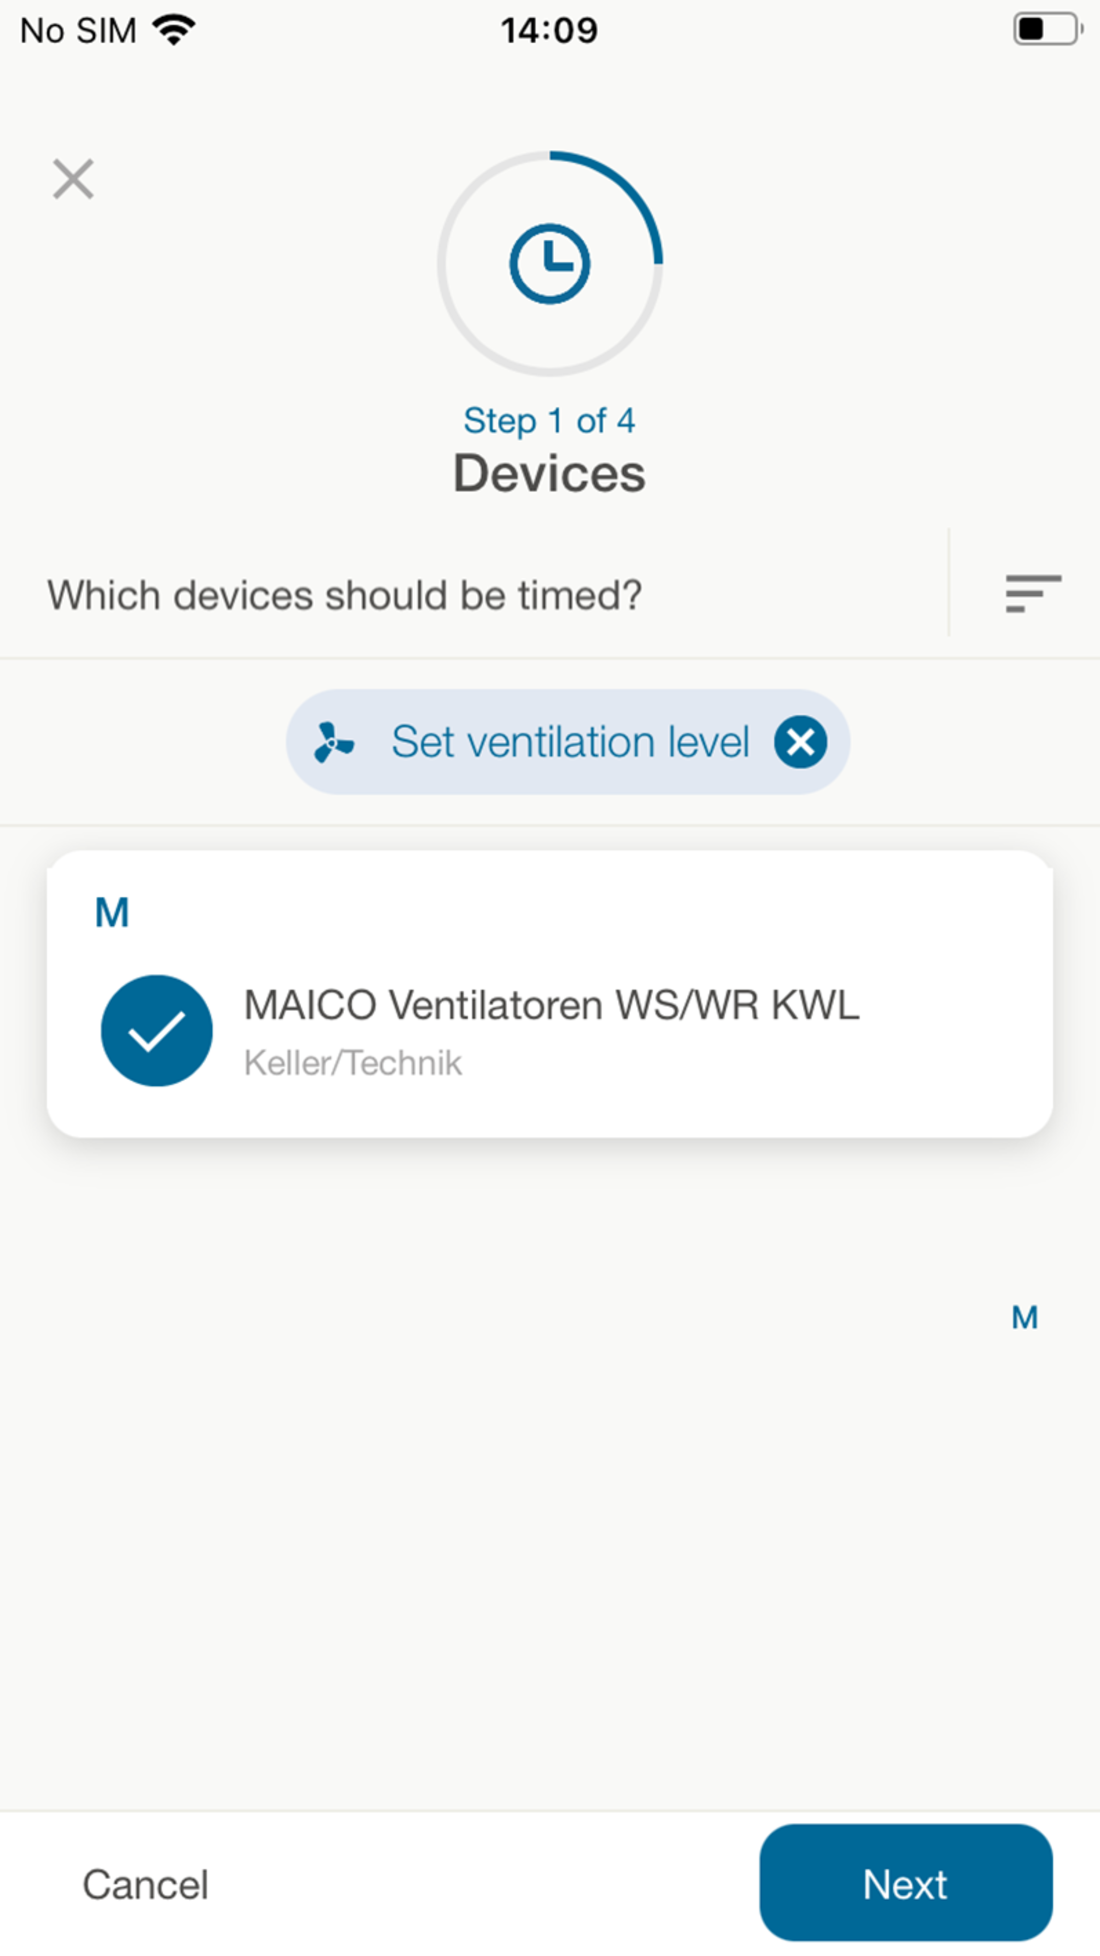
- Confirm step 1 with Next.
- In step 2, set the desired time markers for a weekday (e.g. Monday). First add a start time.
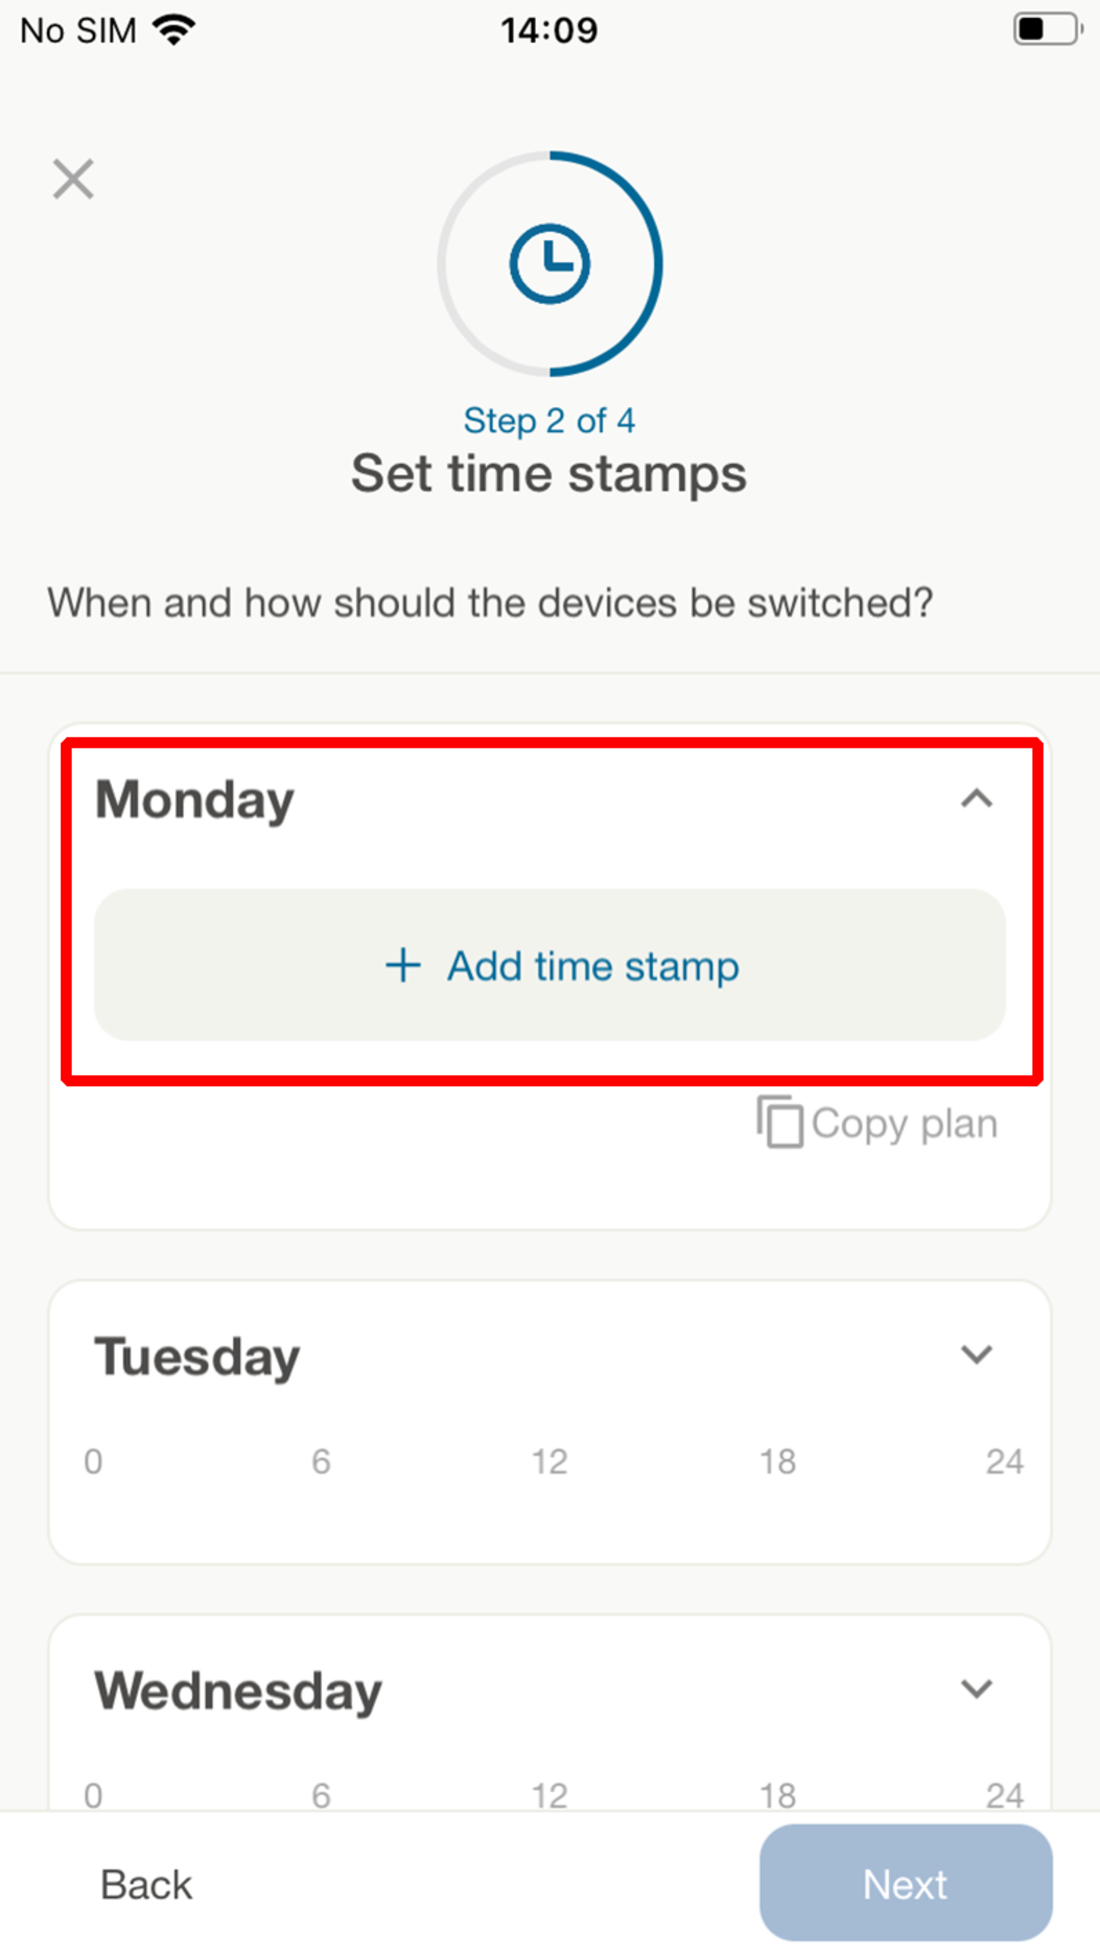
- Select a ventilation level or operating mode from the start time. The following ventilation levels are available: Off and levels I to III, protection against moisture, level up, level down and previous level.
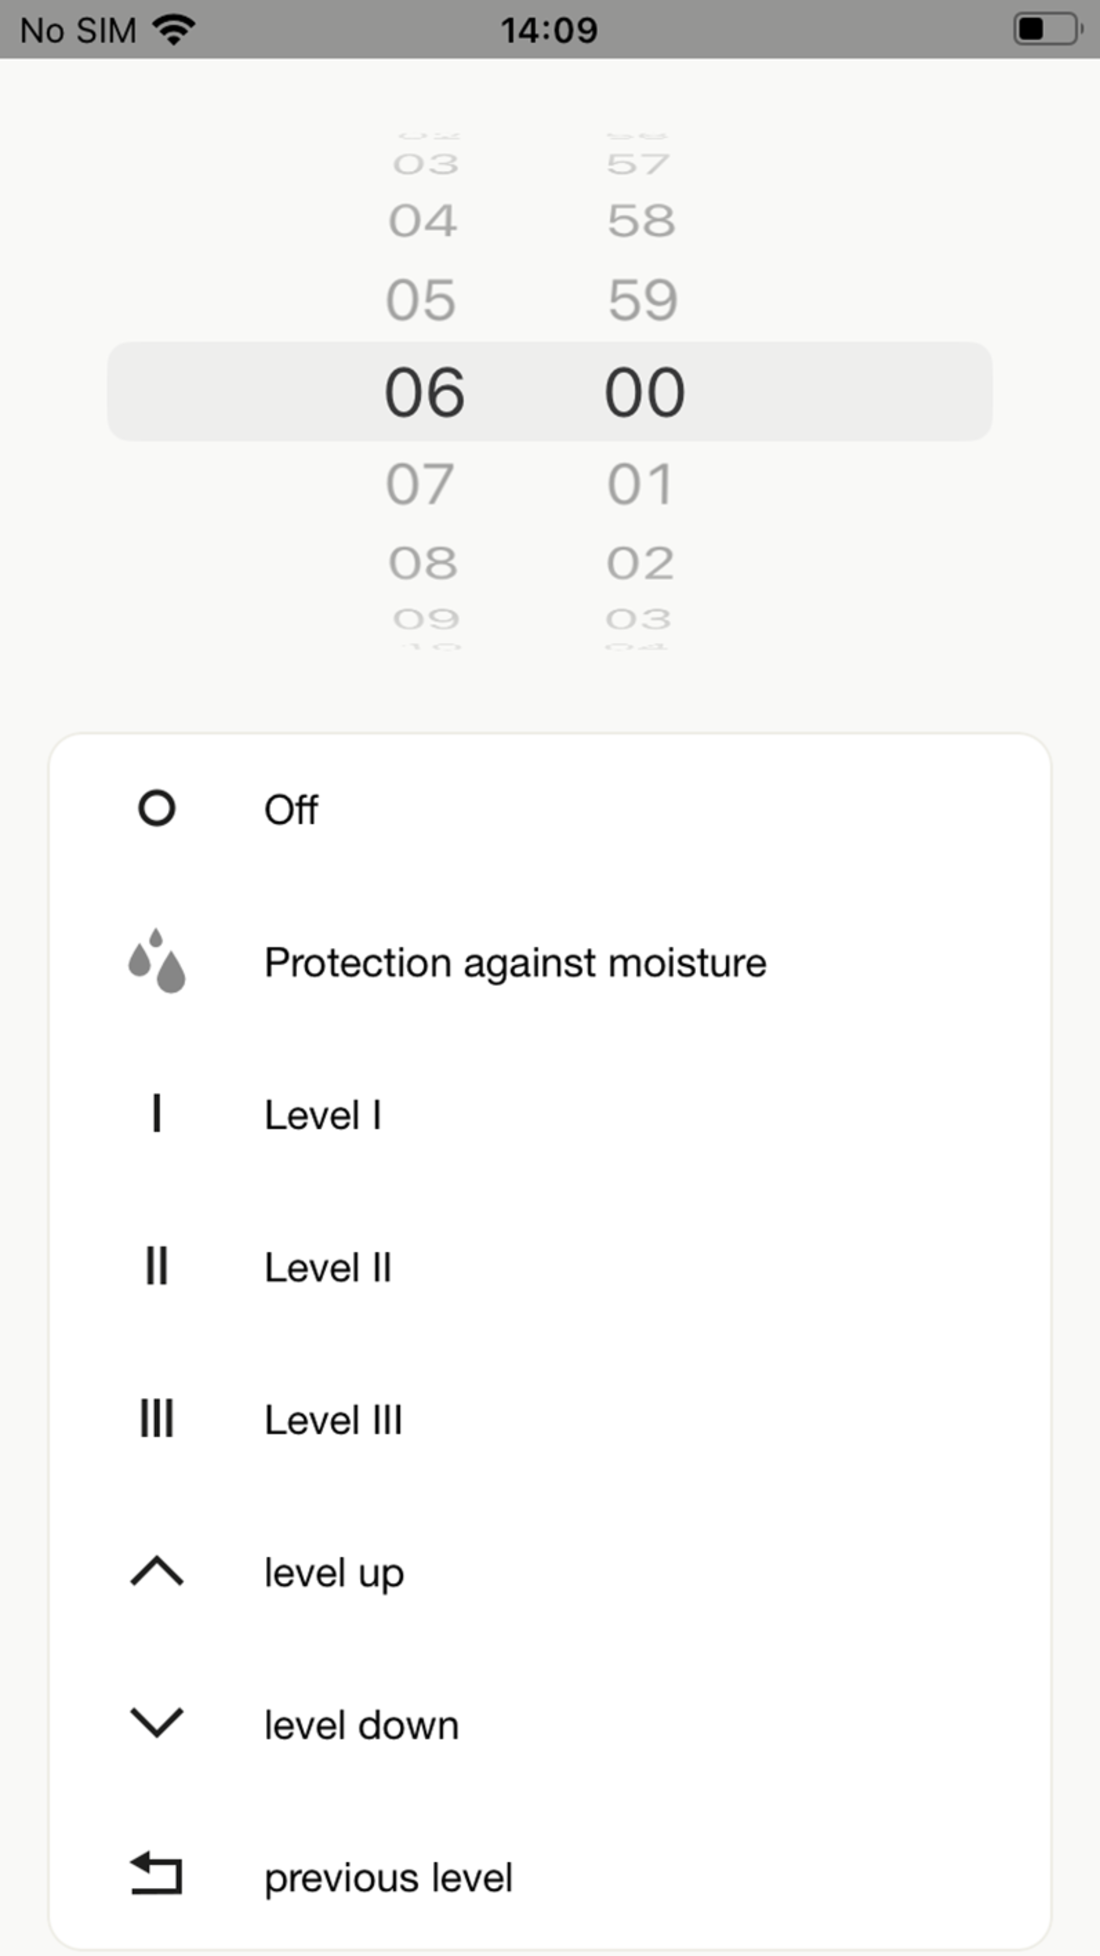
- Confirm with Save.
- Set the end time marker of the time programme/setting range with one of the ventilation levels/operating modes mentioned above. The ventilation unit then runs with these settings until the next time mark. The set time markers are visible in the time-of-day programme.
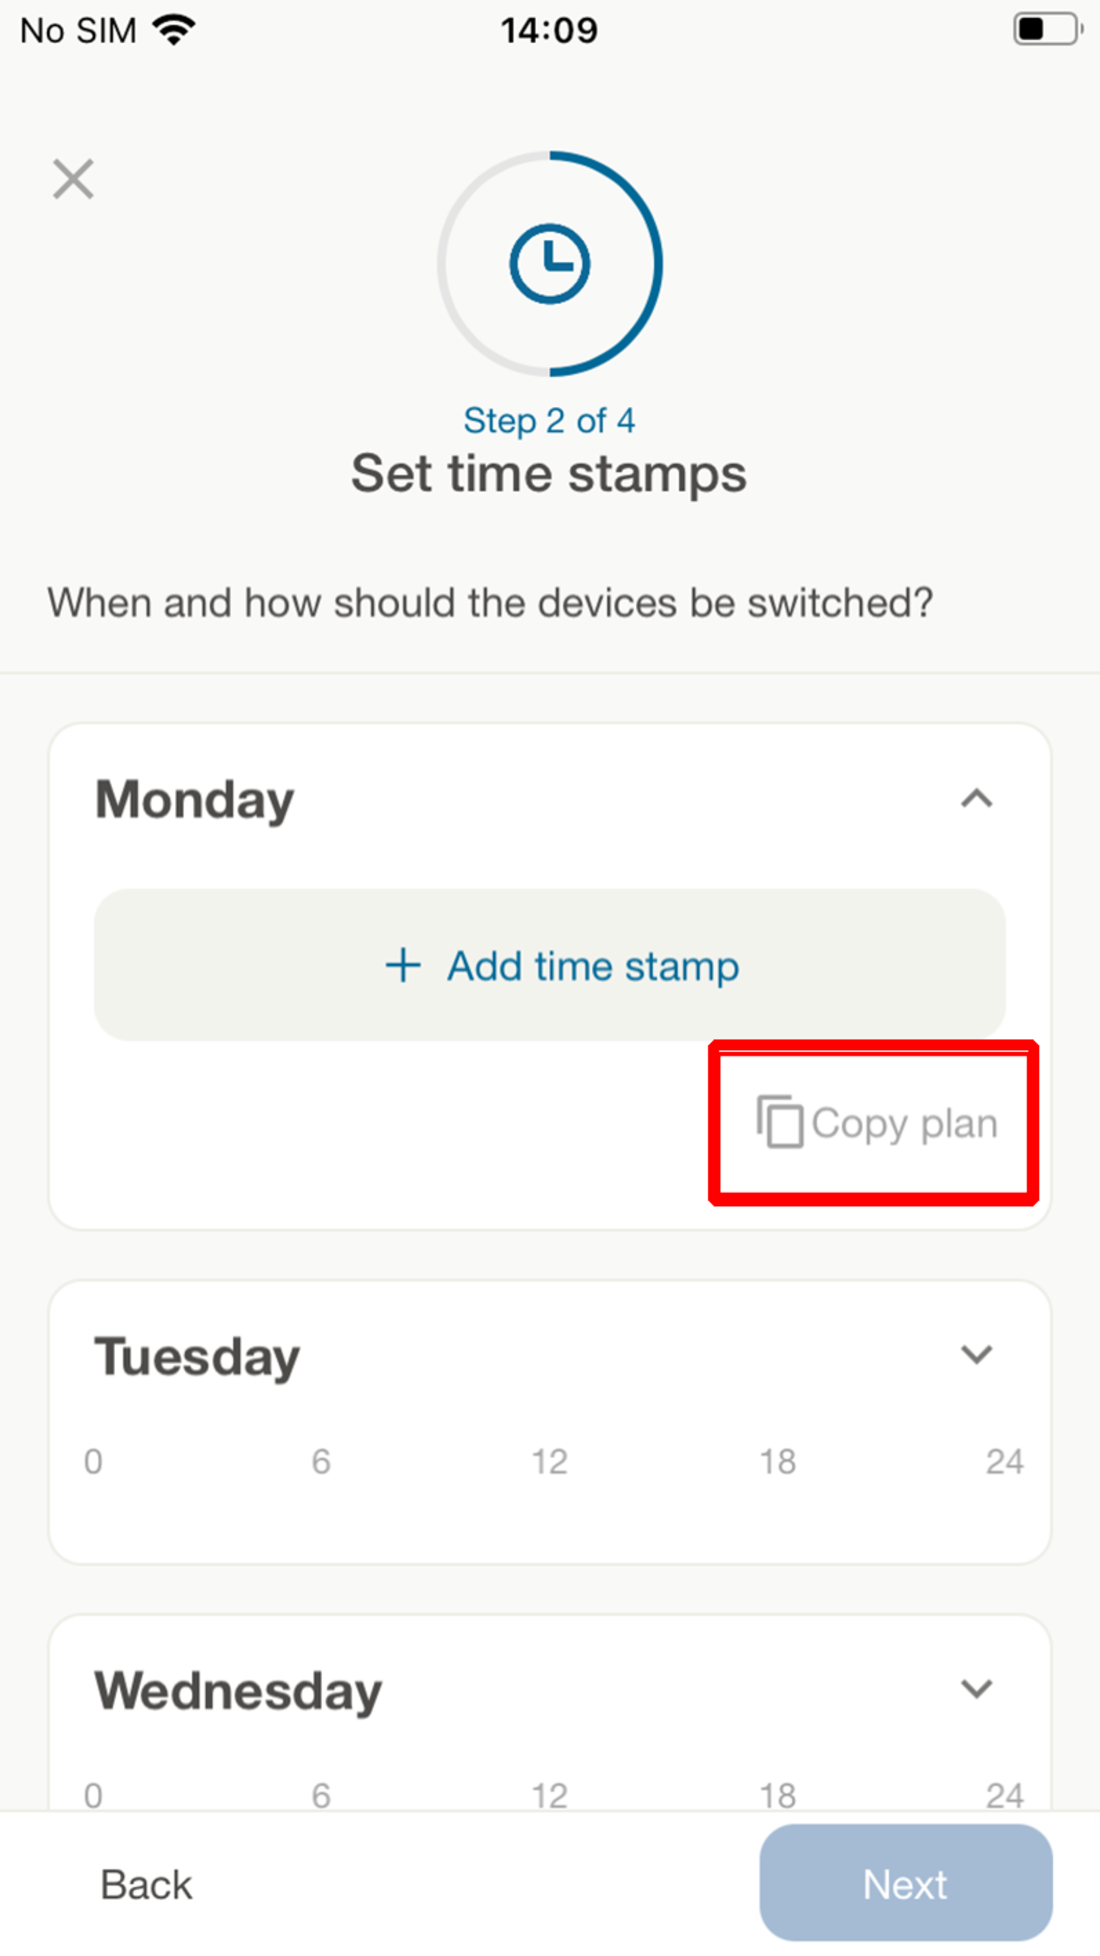
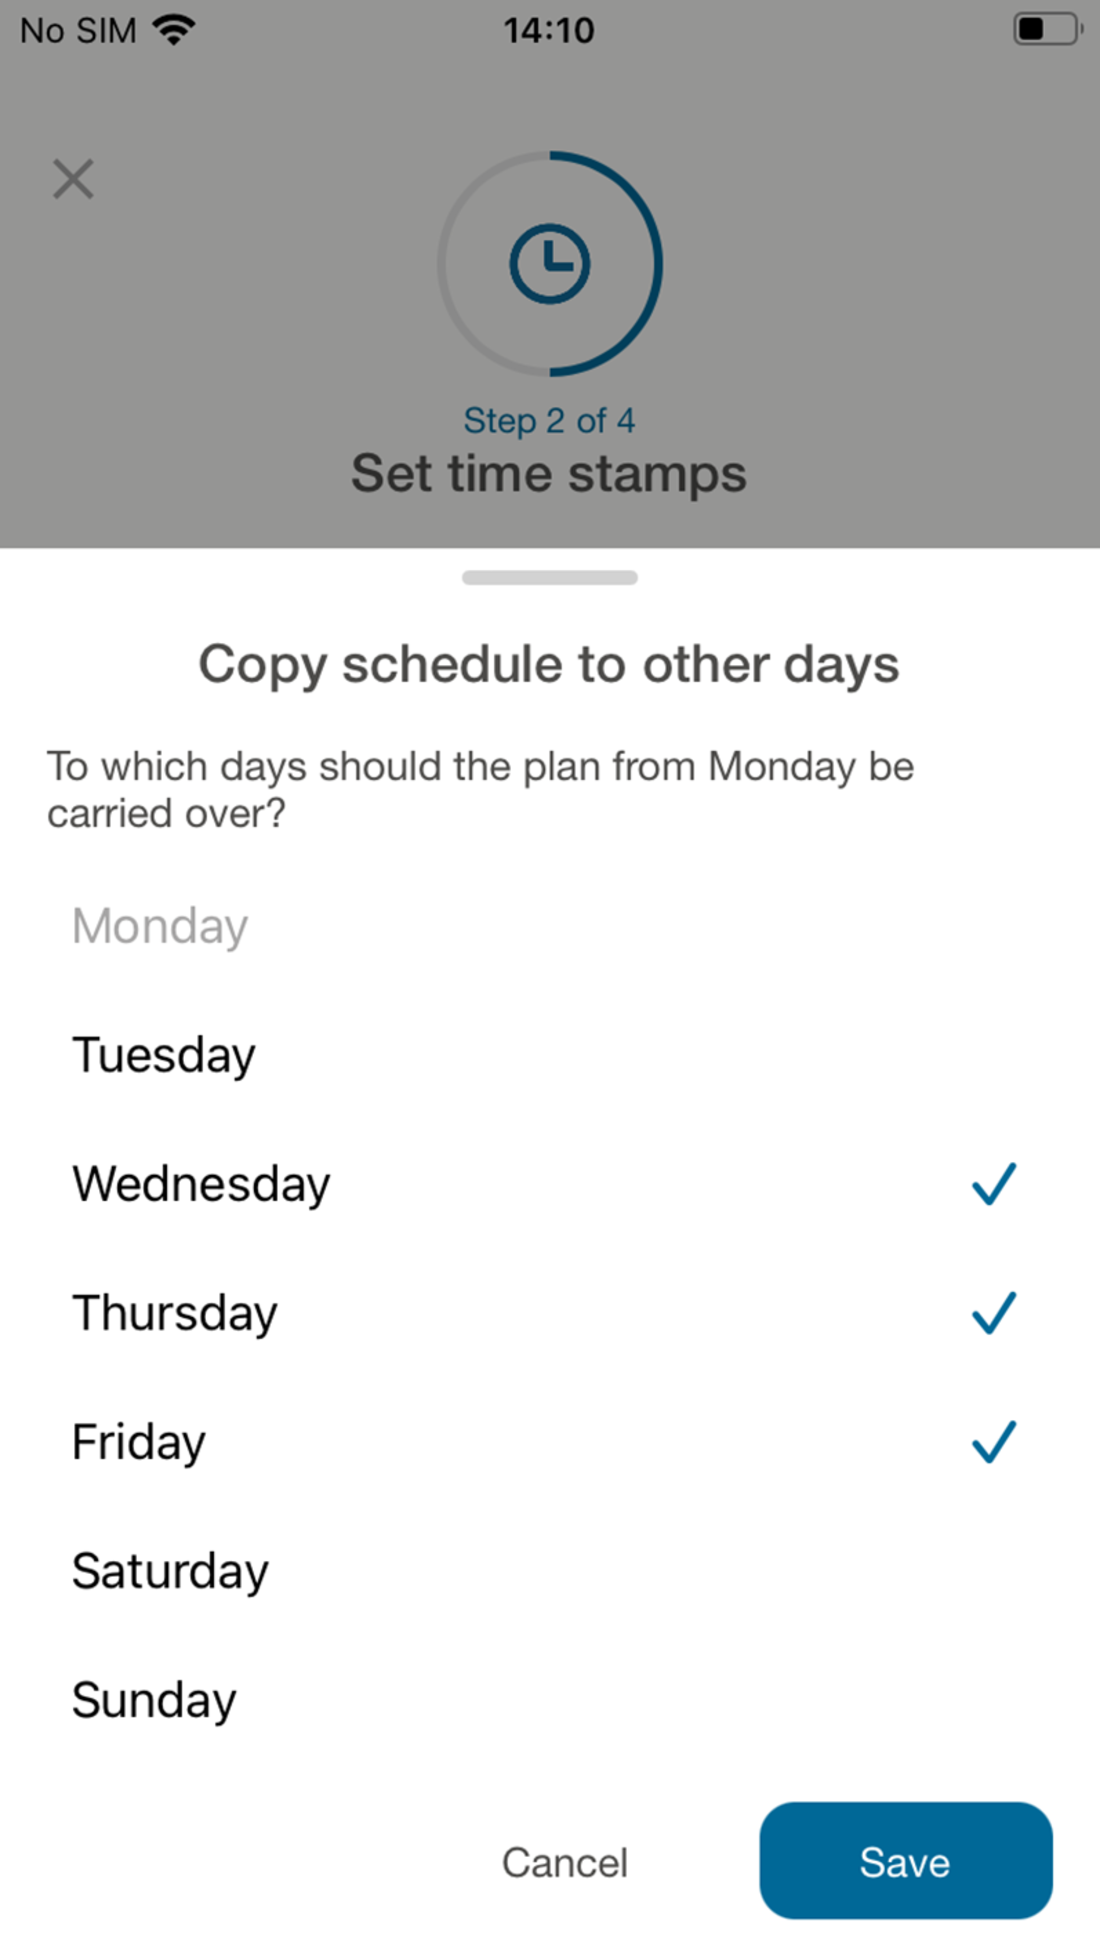
- With Copy plan, you can transfer the time-of-day programme to other days of the week. To do this, tick the box in the overview by selecting the day of the week.
- Confirm with Save.
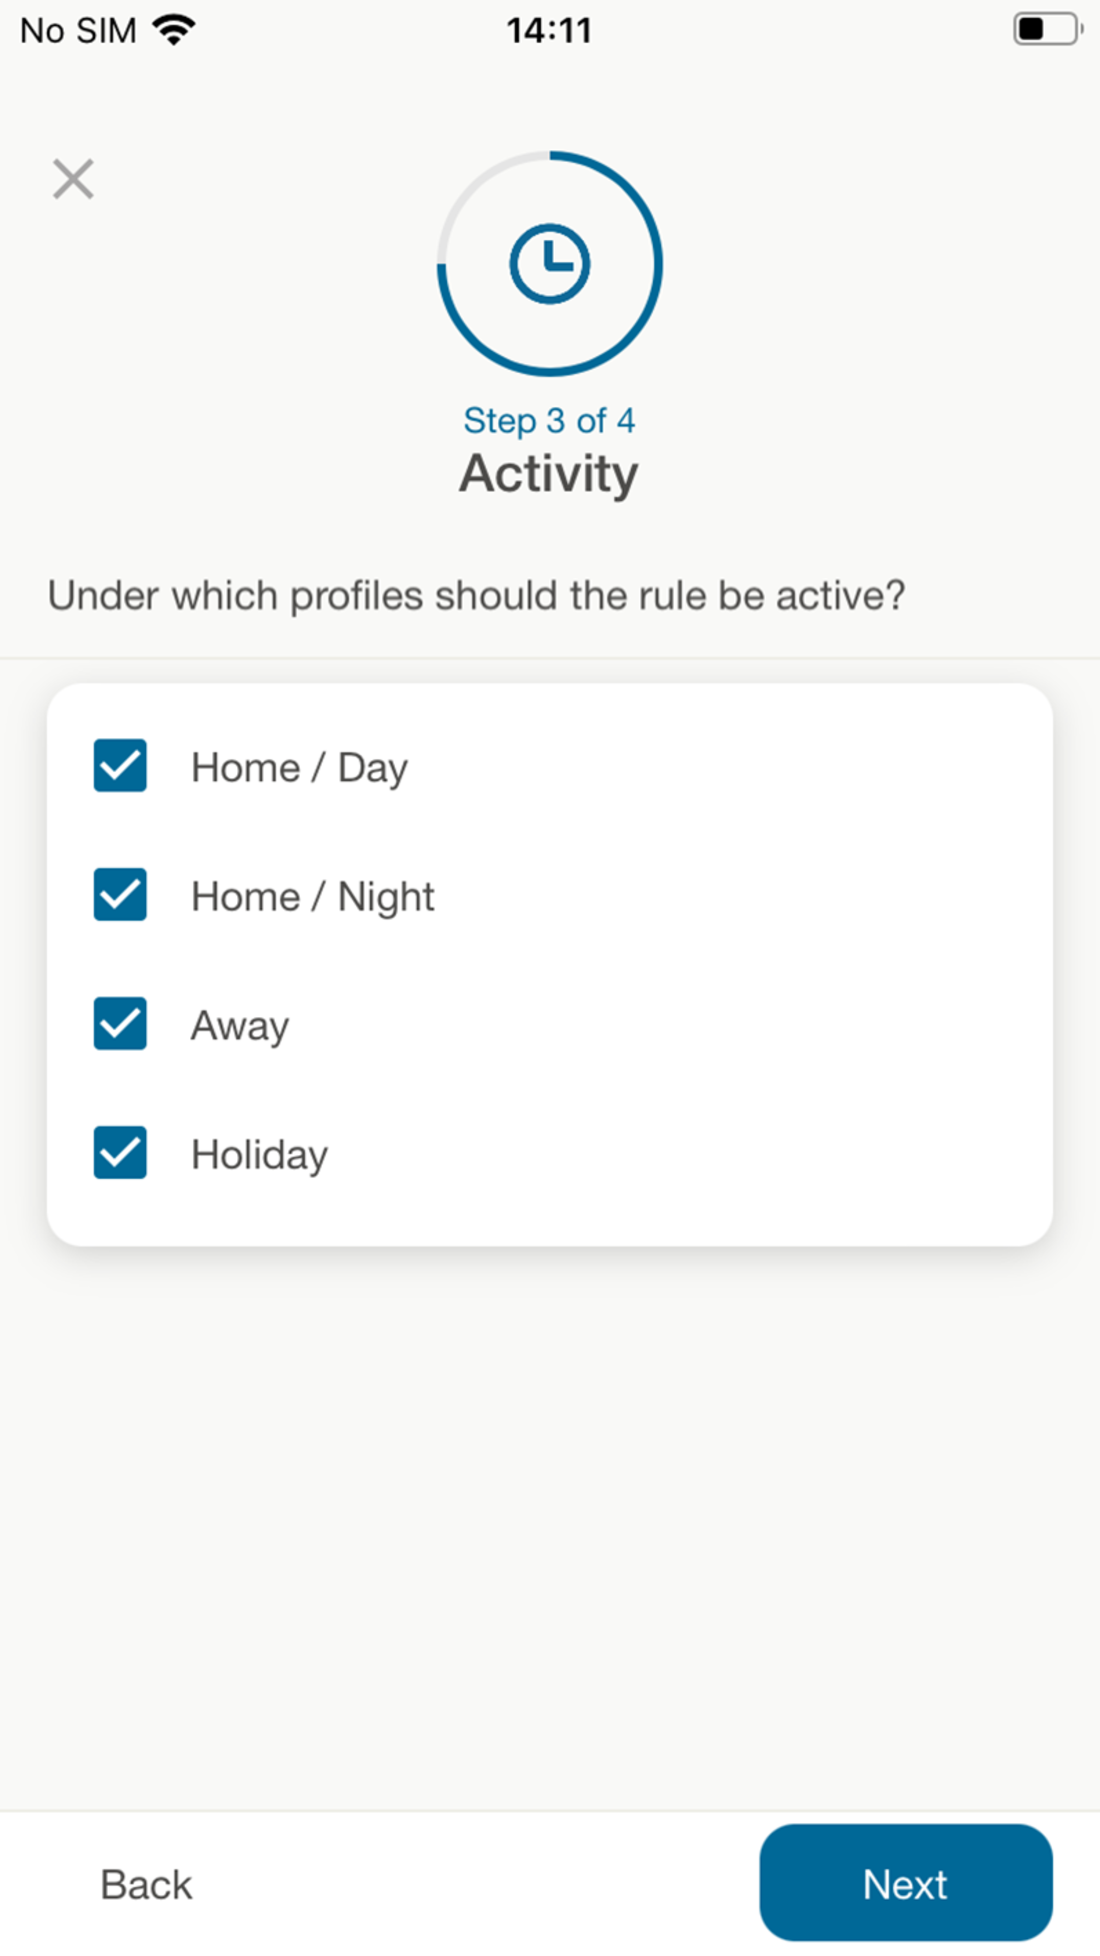
- In step 3, assign the profiles to the previously created weekly time programme. There are 4 profilesto choose from: At home/day, at home/night, out and about or on holiday.
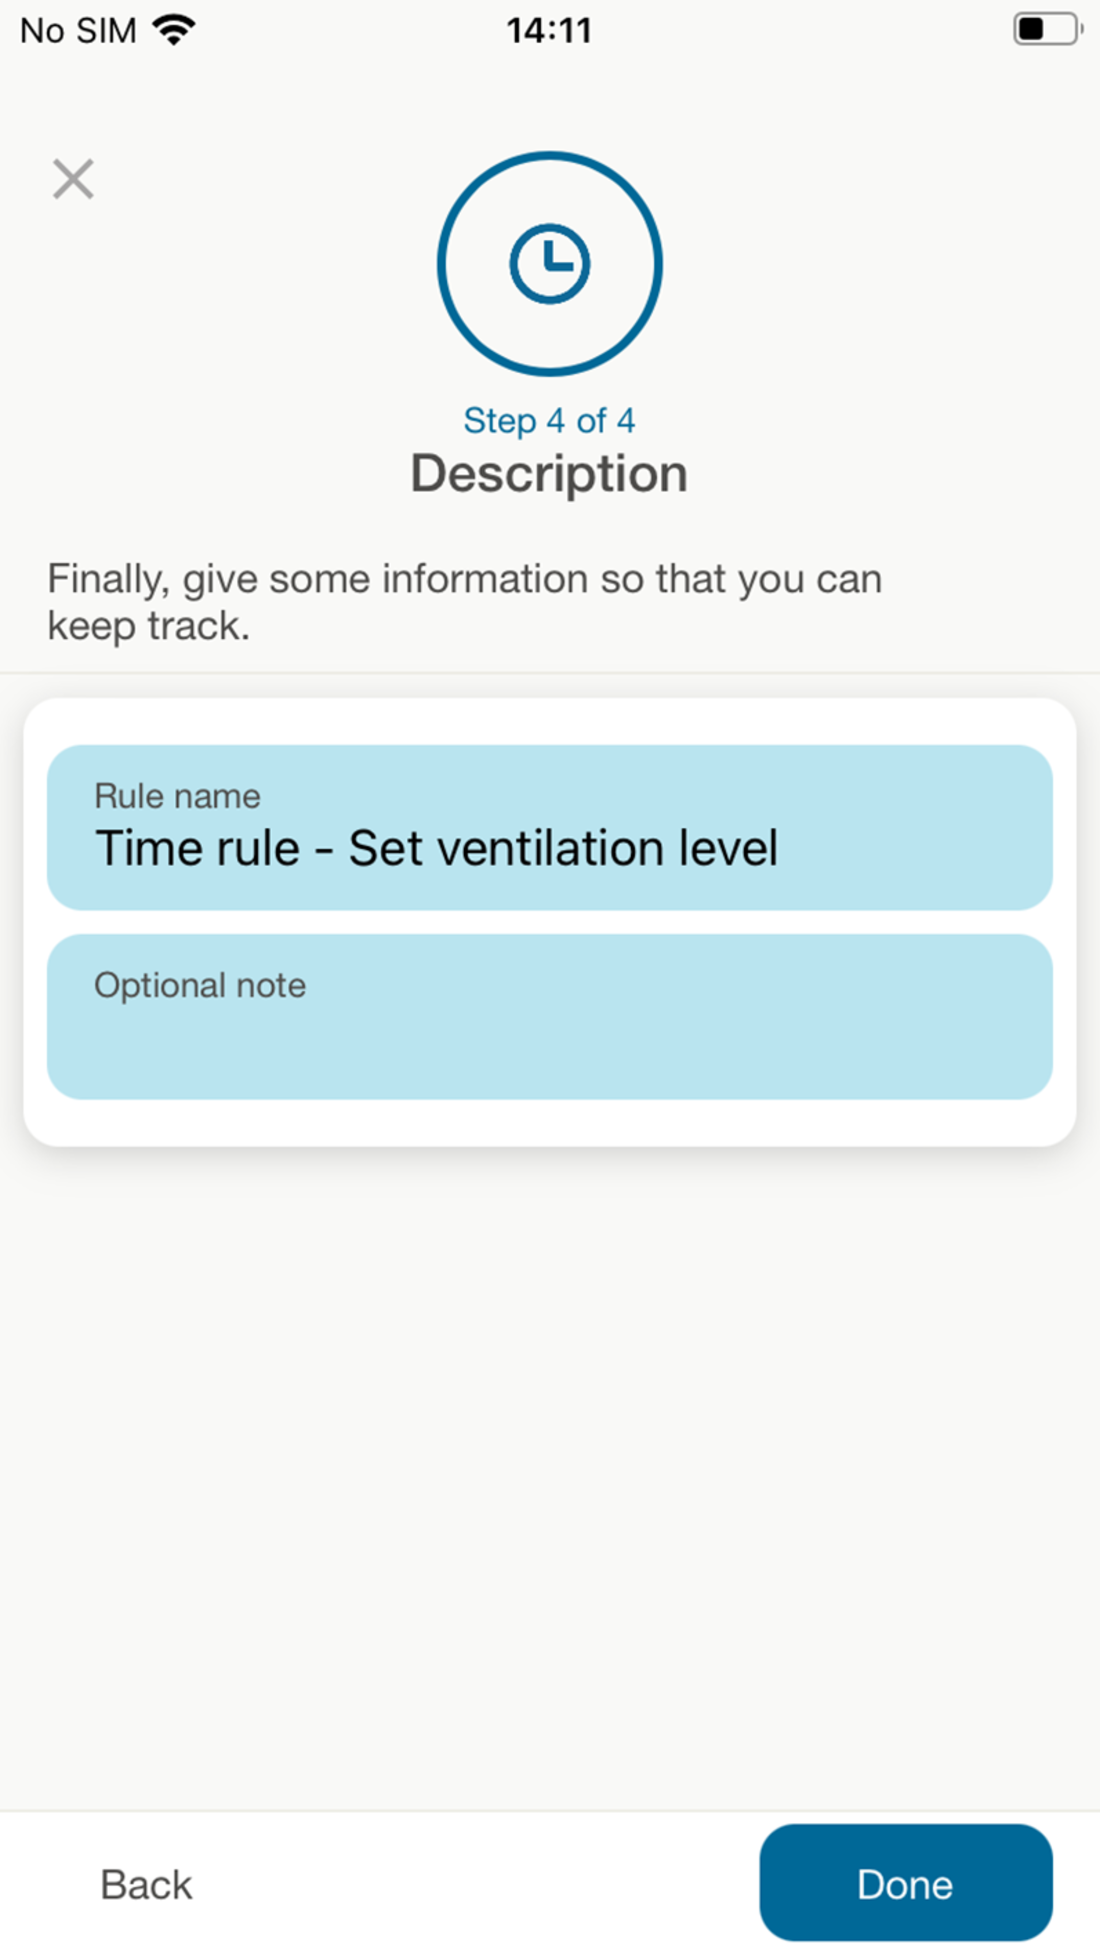
- You can describe the previously created time range in step 4. Specify a setting range name here and describe the setting range under Optional note.
- Confirm with Next.
- Confirm with finished. The configuration level with the setting ranges appears. The newly created setting range is now active.