Preparations for the ER-APB ceiling installation (with fire protection)
(Connection outside of the shaft)

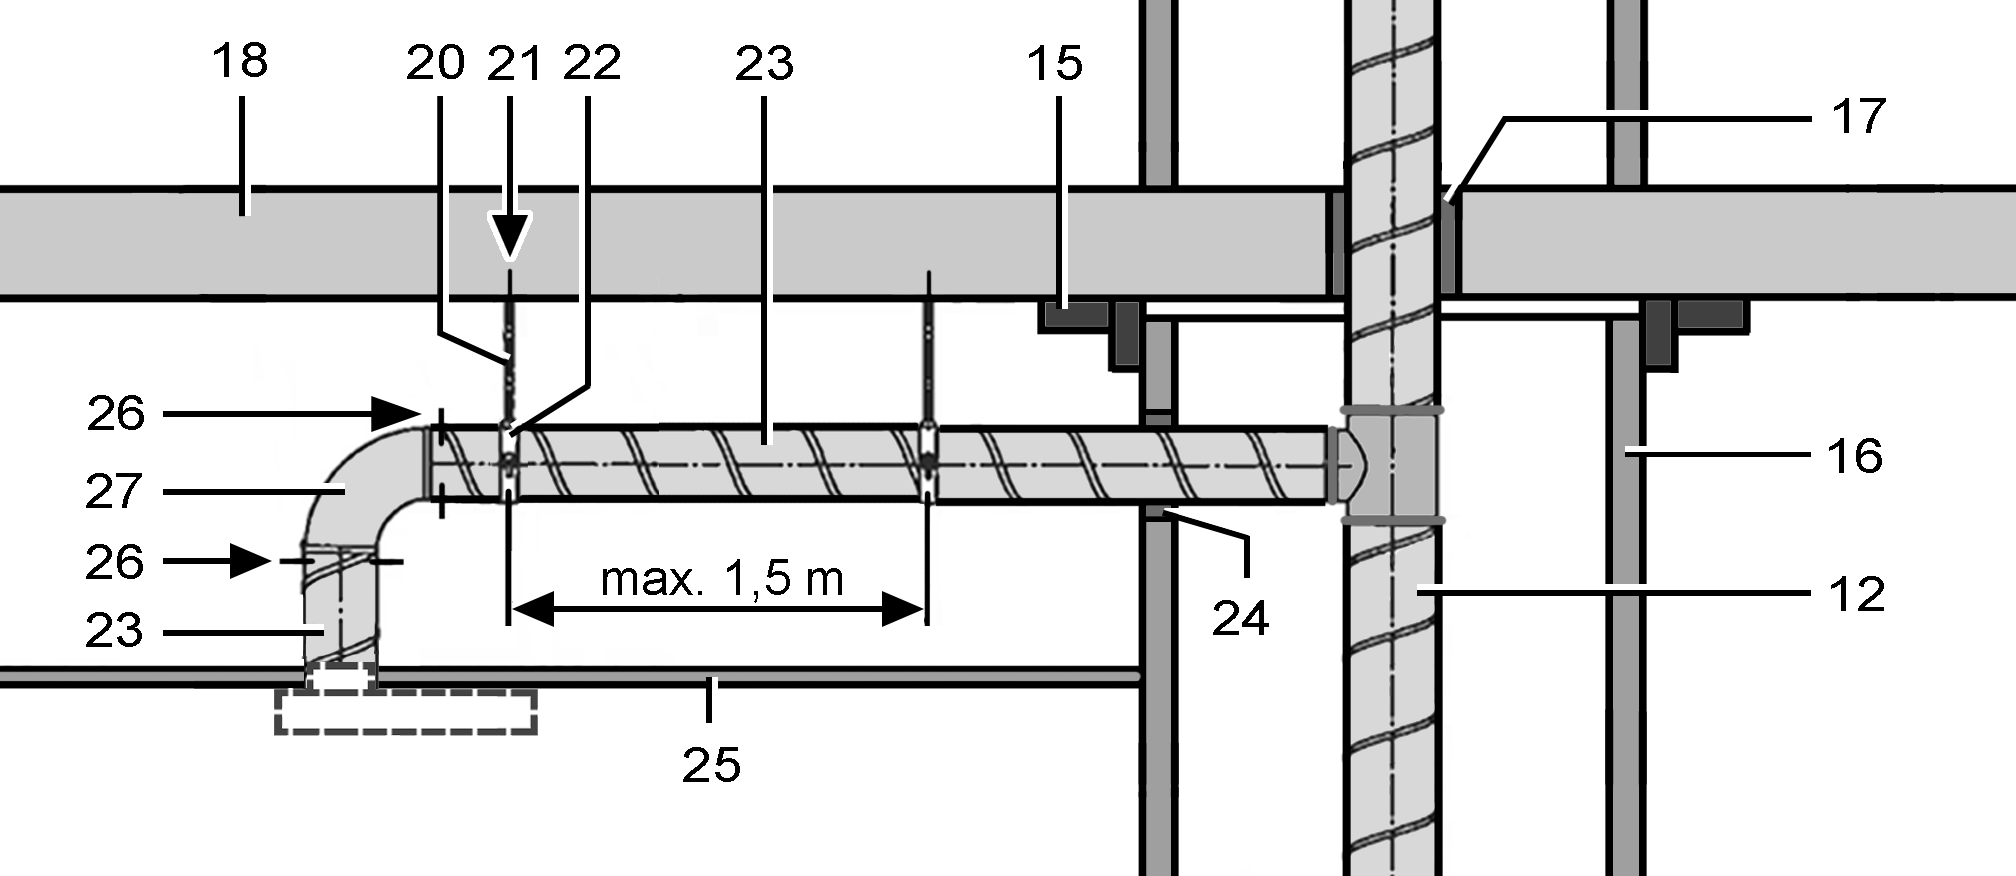
12 | Main duct (steel folded spiral-seams duct) | 15 | Spigot |
16 | Shaft wall | 17 | Ceiling compound |
18 | Floor ceiling | 20 | Steel threaded rod / stair bolt |
21 | Duct fastener | 22 | Duct clamp / clamping band |
23 | Steel folded spiral-seams duct | 24 | Wall/board seal |
25 | Suspended ceiling | 26 | Steel screws or steel blind rivets (3 of each) |
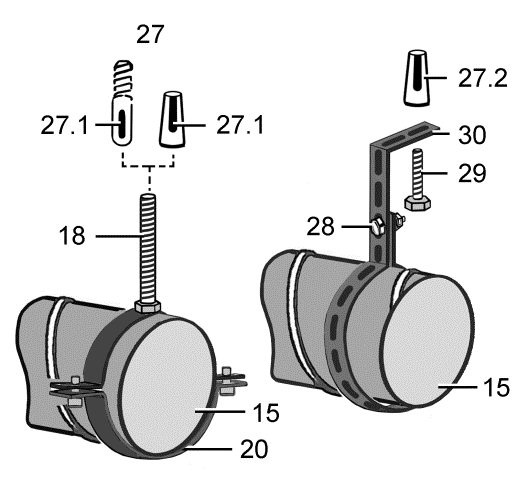
27 | Steel duct bend | 27.1 | Anchor bolt / steel dowel |
27.2 | Metal expansion dowel | 28 | Retaining bolt with nut |
29 | Retaining bolt | 30 | Steel clamping band |
Duct attachment with duct clamp,
alternatively duct attachment with clamping band
Danger due to fire transmission
 Danger to life due to fire transmission if an incorrect connection duct is used on the APB housing when installed in the ceiling.
- Always use steel folded spiral-seams ducts for the connection.
 Danger to life due to fire transmission in case of faulty ceiling compound.
- It is essential that the remaining gap between the main duct and the wall or ceiling is completely sealed with non-flammable materials that are resistant to deformation. For example, use concrete or cement mortar.
 Danger to life due to fire transmission if not flush with the brickwork or with panel building materials.
- If used outside the shaft, seal the gap remaining between the connection duct and brickwork/wall boards with non-flammable materials resistant to deformation.
- For example, use concrete or cement mortar for brickwork or special fire protection filler for wall boards.
Procedure
- Mounting preparations.
- Correctly attach main duct inside the shaft.
- Apply ceiling compound. To do this, encase the ceiling and pour in the material from above.
- Make shaft opening for the DN 80 steel folded spiral-seams duct.
- Fit duct attachments to the ceiling. Only use permitted, suitable mounting material.
- Connect DN 80 steel folded spiral-seams duct to main duct and seal for ventilation, for example with cold-shrink tape.
- Apply brickwork compound. Seal gap between brickwork and folded spiral-seams duct. The gap remaining must be fully sealed with non-flammable materials that are resistant to deformation. For example, use concrete or cement mortar or for wall boards, use fire protection filler.
- Fasten duct bends with 3 steel screws or 3 steel blind rivets.
- Make the DN 80 opening for the unit connection socket in the suspended ceiling (fire resistance is not required). It is essential to observe the permissible installation positions: Permissible installation positions for fans.
- Attach the suspended ceiling and provide a suitable, level substructure.
- Attach spigot made from shaft material F90 around the shaft.
- Continue with the safety-related test of the shut-off device: Electrically connecting the unit.
 Keep a maximum distance of 1.5 m between the duct fastenings. It is essential to observe the installation instructions: